Do I Need To Drum Scan My Negatives?

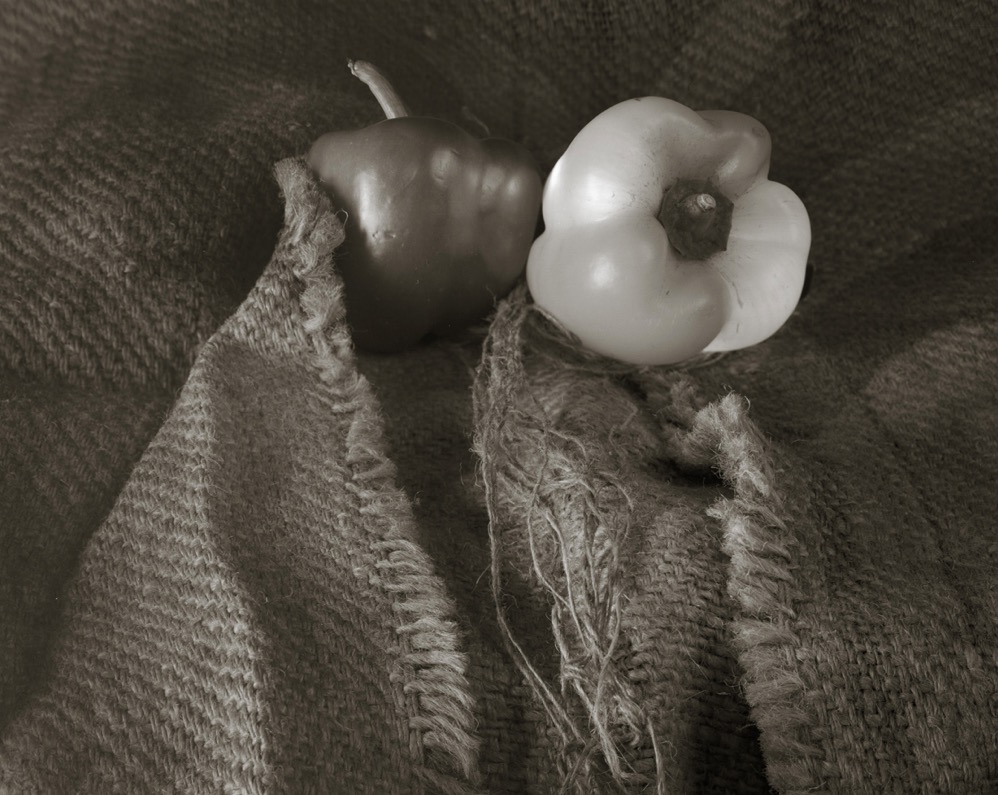
Out of the Sack by J Riley Stewart
Out of the Sack

Photographers who scan film will eventually ask themselves whether it’s worth the cost to get a drum scan of their negatives. Let’s discuss how drum scanning compares to flatbed scanning to learn when you might need the extra quality provided by that mystical drum scanner.

I’ve used film as my image recording tool since the early 1980s. I once printed the images in a wet darkroom on sensitized paper, but have since moved to scanning the negatives and using the resulting digital images to modify and make prints using inkjet printers. This is called the hybrid workflow, and most film users use it today, partially or totally.

Resolution and acuity are two very common ways to assess technical quality of photographic images. Resolution refers to how much subject detail is retained in the image or print. Acuity refers to the sharpness of fine edges and lines.

I own and use both the Epson V700 flatbed scanner and the Howtek 4500 drum scanner. I’ve made thousands of scans from each, so I think I’m qualified to help you answer “Do I need a drum scan?”

My needs for scanning will likely differ from yours. I like to make large high resolution prints. I’ve sold hundreds of such prints, and many up to 32×40 inches in size from medium- and large-format negatives. My experience with 35mm negatives isn’t vast, but I’ve scanned perhaps hundreds of them for evaluation or printing.

Large size prints demand the highest level of scanning resolution. Any lapse in quality will utterly destroy the feeling of a print needing a high sense of texture or subject clarity. But how much resolution is enough? Can you get by with a more affordable, small flatbed scanner or do you need to drum scan your negatives?

I’m going to show you a real life test that will illustrate the difference in resolving power of a drum scanner and a modern Epson V700 flatbed scanner. I’m using a 4×5 negative, but you can reasonably extrapolate my findings to any size negative.

The image below “Out of the Sack” is from my “Afterglow” project. The same 4×5 negative was scanned two ways: (1) Epson V700, undermount, wet mount technique, 4000 dpi using VueScan™ and (2) Howtek™ 4500 drum scanner at 4000 ppi and a 6 micron aperture using DPL™ software. Both resulting scans produced negatives in the 320 MP range, which means printing them at 300 dpi makes a print around 60 x 48 inches.

The small white rectangle represents an approximate 2″ wide section of the large 60 x 48″ print. We’re going to look at this section in detail to compare the V700 to the Howtek scan.
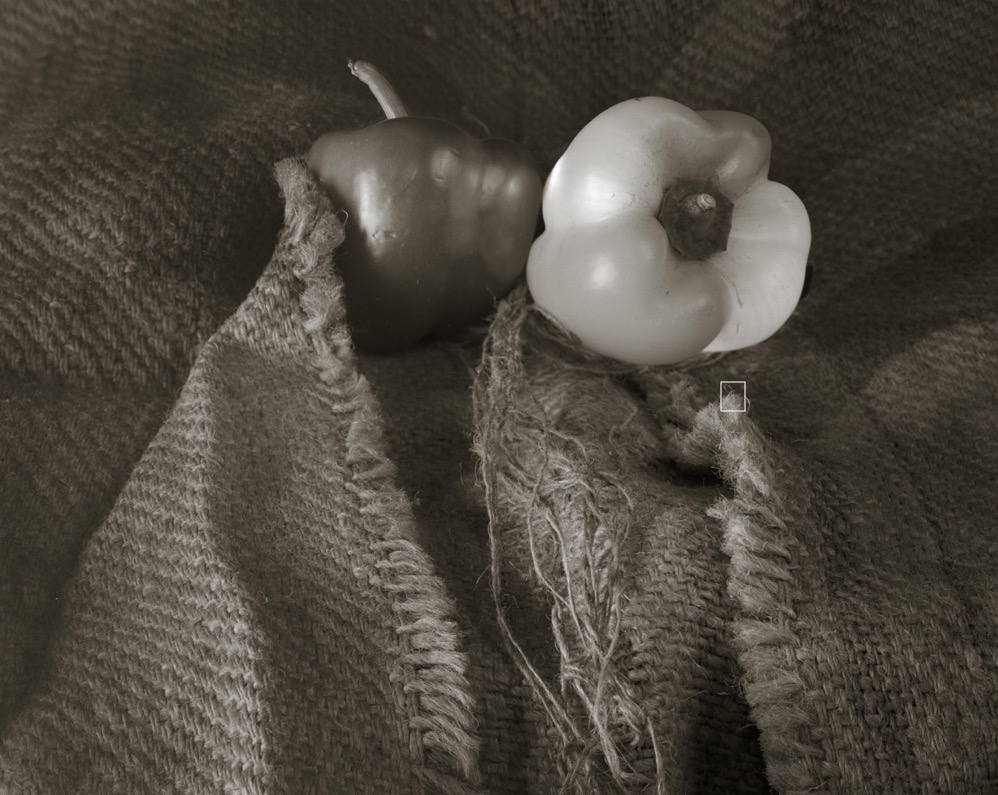
Rectangle shows area of interest for comparing V700 flatbed and Howtek 4500 drum scans.
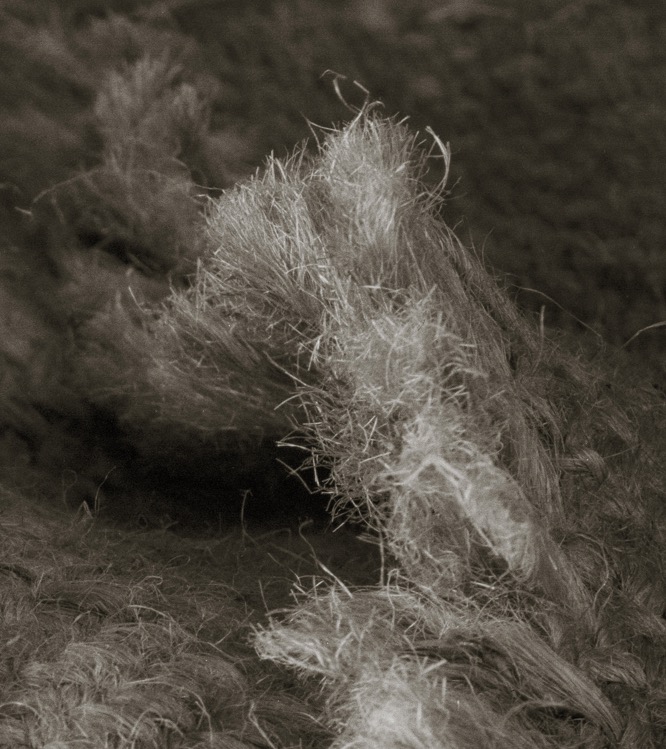
11 inch wide section of the 60×48″ print, showing the delicate fine details and textures in the burlap fringe around the area of interest.

Remember the 2″ wide area of interest is a very small section of the 60×48″ print, but is still large enough to elicit a sense of fine texture and detail in someone viewing the photograph on a wall.. But in a 30×24 ” print, the area of interest would be 1″ wide, and in a 15 x 12 ” print, 0.5″ wide. And at some smaller print size, you’d need a loupe to see those same details and texture.

This is important, because any difference in quality between the two scans will be diminished merely because of the size of the print, regardless of viewing distance. As the print gets smaller, the relative significance of any small section of the print also diminishes. So if you routinely print no larger than say, 16×20 inches, the conclusions I draw from this experiment will have far less importance than I draw from the large reference photograph.

Let’s see how the V700 and Howtek compare in a real-world scenario.

The images below are 1:1 depictions of the small rectangle in the image above (i.e., the area of interest). On the left is the drum scan (Howtek 4500) and on the right is the flatbed (Epson V700). Neither image has been sharpened. Which is “better?”
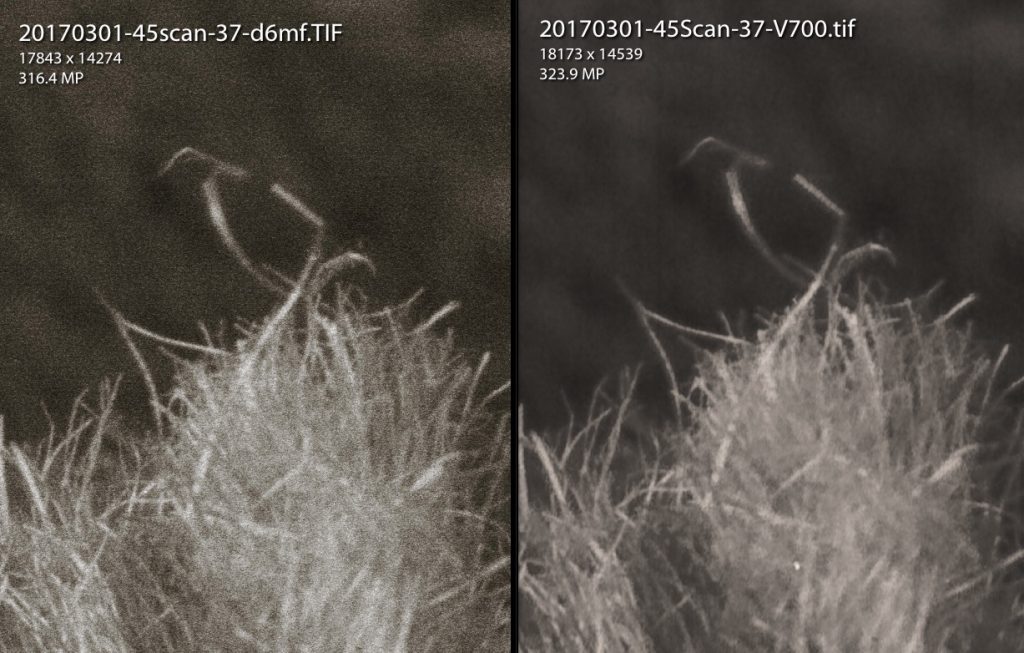
First, there are differences between the drum scan and the unsharpened flatbed scan. Resolving power of the Epson V700 is very, very close to that of the Howtek 4500. Almost every element (lines, shapes, tones) in the image can be found in both scans. To assess resolution I like to look at lines that create a “V” pattern (or intersectional angles) and at parallel lines that create a line of shadow between them. You can see that almost 95% of such patterns appear in both, in both highlight tones and shadow tones. There are only a small number of very insignificant angles and inter-line shadows that can’t be found in the V700 scan. This indicates that resolving power in the V700 is very close to the Howtek drum scanner.

Second, the main difference between the drum scan and the flatbed scan appears to be due to the higher acuity possible in the drum scanner. All edges are just a bit sharper on the drum scan, giving the appearance of higher resolution, but in fact it is not. Acuity can be best enhanced by sharpening the image (but remember, excessive sharpening can also degrade resolution).

The next image permits side-by-side comparison between the unsharpened drum scan (Howtek 4500) and the V700 scanned image slightly sharpened in Lightroom. Which is “better?”
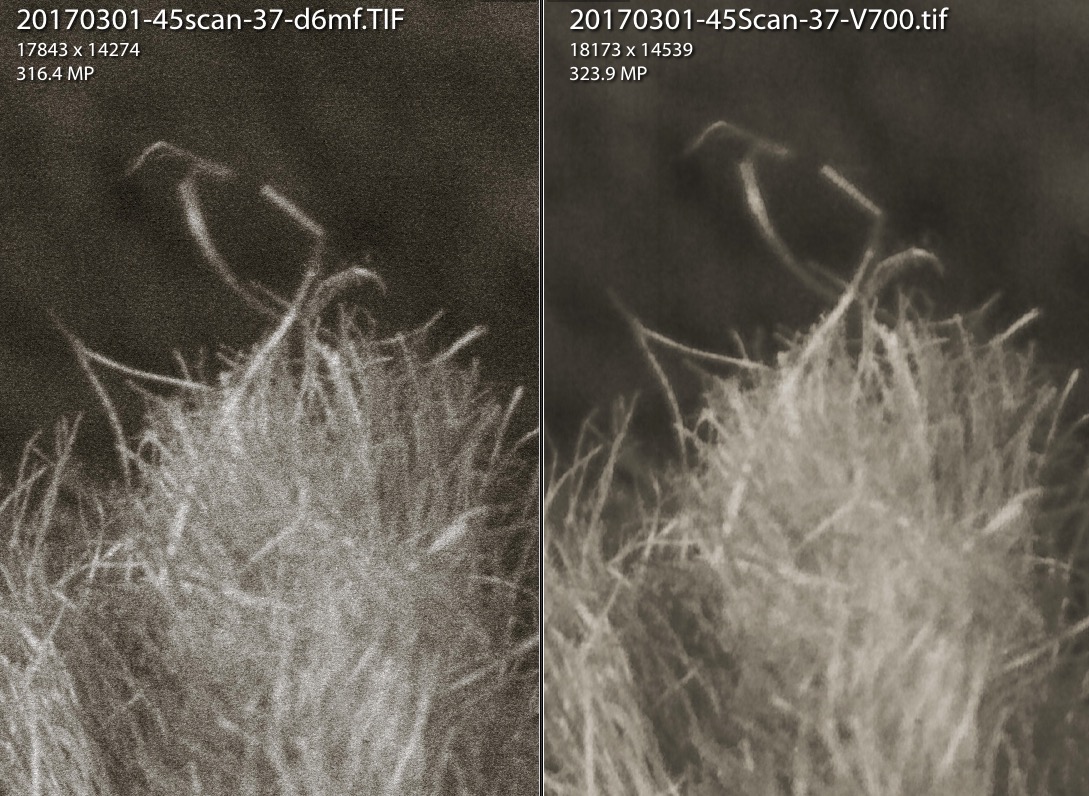
Indeed, a slight degree of sharpening to the V700 scan improves, but does not equal, the acuity of the drum scan. But it comes really, really close. The settings I used to sharpen the V700 image in Lightroom were Amt 91, Radius 2.0, Detail 33, and Masking 94. This is a small degree of sharpening on a 320 MP image.

What do these comparisons tell us?

My results are not inconsistent with those reported by others. They did the same thing (perhaps not as definitively as I have) showing the differences in image quality between a highly magnified portion of a image when scanned with a flatbed scanner and with a drum scanner. The drum scanner always looks ‘better’ than the flatbed scanner.

I’ve gone one step beyond and showed that the V700 appears to resolve details almost as well as the Howtek 4500 drum scanner, but the V700 suffers a bit in obtaining the same level of acuity. Luckily, minor lapses in acuity can be nearly corrected by careful sharpening.

So, let’s put all this in context again. We began with a scan of a 4×5 ” negative that would produce a 60 x 48 ” print when printed at 300 dpi. 300 dpi is above the 240 dpi below which most healthy human eyes begin to detect a loss of resolution. I showed that the V700 (using my undermount wetmount workflow using Vuescan can resolve nearly all the detail resolved by the Howtek, but that minor sharpening of the V700 image is required to produce nearly all the acuity provided in the unsharpened Howtek scan. This is actually pretty remarkable.

Is the difference between the Howtek and V700 acuity important enough to warrant the extra cost of a drum scan? To answer that, you’d need to ask:

  • Could your eyes detect the difference I’ve shown if you were to closely inspect a 2″ wide section of a 60 x 48 ” print and say “..that’s not as good as it could be.” You’d not have the benefit of having a drum scanned print as a comparator as we’ve done here. So I’d hazard a guess that most would not be able to detect that small difference.
  • Do you routinely produce prints that are over 12x linear enlargements of your negatives, as used in this example? If so, you may need to eake out every bit of resolution and acuity that only a drum scanner can provide. Having said that, I’ve created many exquisite, fine prints to 40 x 32 ” from 120 size negatives, a linear enlargement factor of around 15x.
  • Do you produce high-quality negatives having sharp subjects? If sharpness (i.e., resolution + acuity) isn’t a consideration in your final prints, then it won’t matter during scanning either.
  • Do you know how to get the most out of your flatbed scanner? I’ve written several articles about scanning with the Epson V700 to maximize image quality as well as several other articles about the Craft of Photography. You may enjoy reading them.

So, do you need to drum scan your negatives?

The short answer is “it depends on the size of the negative and the size of the prints to be made from that negative.” For most of us shooting 35mm film and printing to not larger than 16×20 inches, a high quality, 4000 ppi scan from a modern flatbed scanner could make an exceptional print. But you’ll need every bit of scanning power to make a quality print larger than 16 x 20 inches, and that may mean investing in a drum scan. This also assumes a perfectly sharp, full crop negative from which you take the scan, of course. Still, you will be limited in print size: even drum scanning will not likely get much beyond 18×24 inch fine print from perfect 35mm negative. If you want large fine prints, you need to start with large negatives.


Update 6/23/20:

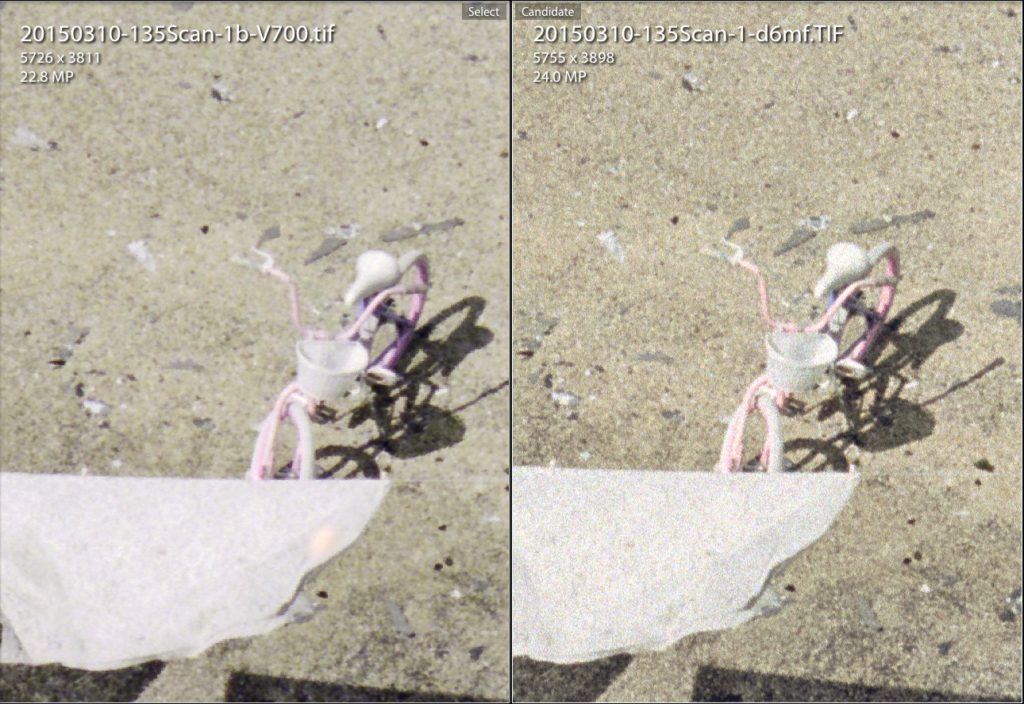
Some of you have asked for a 35mm comparison as I’ve done above for a 4×5 negative.  I don’t have many as I rarely shoot 35mm, but I can offer one example. The first image is the complete 35mm frame showing an inset box, from which I then show a 1:1 view of a small pink bicycle on a roof top, first from a V700 Scan and then from a drum scan. Both were sized to 4000 dpi (~24mp) and under a wet mount protocol. Both images were sharpened optimally (and modestly). 
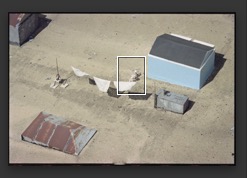
Full frame of a 35mm negative
Comparison of 35mm drum scan to flatbed scan
The left frame is a 1:1 view of a 24mp image scanned with the Epson V700 at 4000 dpi. The right is from the same negative, but scanned using the Howtek 4500 drum scanner.

You’ll probably agree that there are noticeable differences in both acuity and resolution comparing the flatbed with the drum scans in the 35mm format. Keep in mind this is approximately what you would see in an 18.5 x 13 inch full-frame print (printed at 300 dpi). The differences would be less detectable in smaller prints, to a point where you’d need a magnifying loupe to see them. 

End of Update


Since I have both my own drum scanner and a good flatbed scanner, which do I use for my final scans of my larger format negatives? Well, I tend to be a perfectionist and I know the drum scanner can get me closer to perfection, so I use my drum scanner for final production, especially for my larger prints for exhibition. But I have no qualms about relying on my Epson V700 for all pre-production proofs, book images, or anytime the expected print sizes are less than 40×32″ or so, depending on negative size..

Today’s modern flatbed scanners are really quite good once you’ve mastered their capabilities. The linear CCD sensors used in these printers will likely never compare exactly to the PMT sensors of the drum scanners of yesterday, but who knows? As the PMT machines become more rare, they may become completely obsolete. While we have them, they definitely have their place in creating the highest quality of images in large prints. For small prints, especially from larger negatives, the cost of getting a drum scan is probably not worth it.

All comments and questions welcomed.

J. Riley Stewart, copyright 2020.

Wet Mount Scanning: The Undermount – Overmount Dilemma

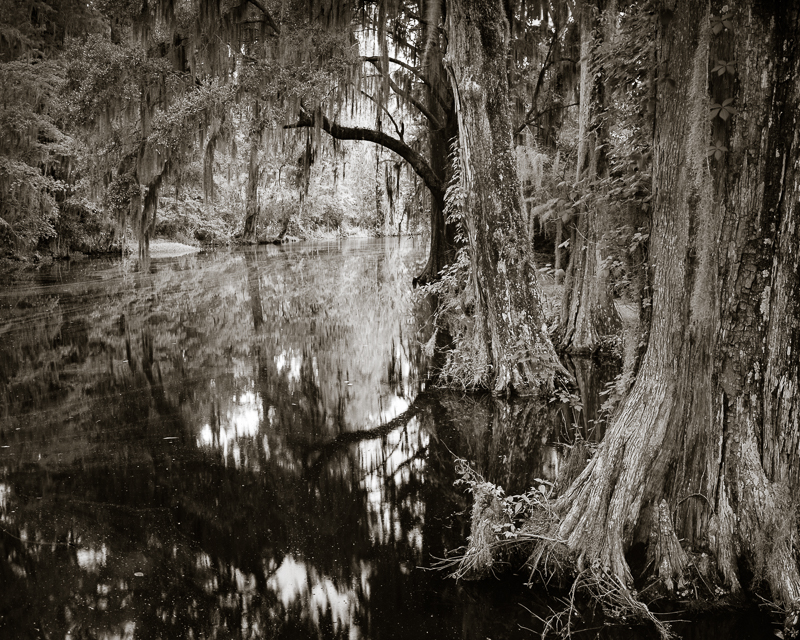
Lowcountry Cypress, J. Riley Stewart, High resolution 40×32″ fine art print.

Let’s talk about different ways to wet-mount negatives on a scanner for the best scanning results.

For years I’ve been scanning my 35mm, 120, and 4×5 negatives using a wet mount workflow, using either a drum scanner or an Epson V700. I made the move to wet mount on my V700 following testing that indicated a slight improvement in image resolution, a slight lessening of dust spots, and since I could wet mount sections of 120 size film easier than using the native MF carrier.  Plus, after a bit of practice, I realized that wet mounting was just as easy as anything else.

To wet mount on any scanner, you need a mounting base (i.e., platen), the negative, mounting fluid, and a clear cover sheet. I use Kami wet mount fluid and high grade mylar cover sheets, both from Aztek. The film lies on a rigid platen. Between the film and platen is applied a thin coat of mounting fluid. Over the film lies the cover sheet. Between the film and cover sheet is a thin coat of mounting fluid. This set up provides an optically correct path for the illumination light to pass through the negative to the sensor, with (ideally) no diffraction and reflection as it passes through the platen, mounting fluid, or mylar.

Since any disruption to the light path could affect resulting image quality, carrier system design (i.e., platen, fluid, and cover) must minimize their inherent bad effects on  image quality. Thus, it’s worth talking about undermounting vs overmounting on a flat bed scanner.

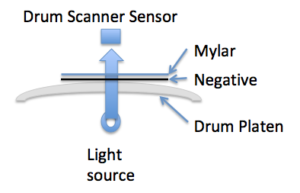
By far, the drum scanner does the best job, but that’s because drum scanners use adjustable apertures and photomultiplier tubes instead of CCD sensors to record the data from the negative. Like flatbed scanners, drum scanners use a carrier system of platen (usually made of acrylic), fluid, and mylar to hold the negative during the scan.

How you sequence the  light source->>sensor is fixed when using a drum scanner. The sequence is always source->platen->negative->mylar->sensor. 

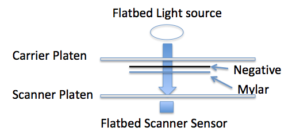
When applied to a flatbed scanner, this same sequence is referred to as undermounting, i.e., the negative is illuminated by the light source after the light has passed through 1 pane of glass (i.e., the negative carrier glass or platen) then the negative, the mylar, and finally the scanner’s platen glass before reaching the sensor. 

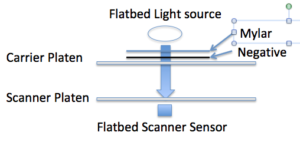
But typically, most negative carriers adapted for wet mounting employ the overmounting sequence, i.e., source->mylar (or cover glass)->negative->carrier platen> scanner platen-> sensor.

For my own work, I’ve adapted my V700 to permit wet mounting as described here and typically use the undermount method.

Betterscanning(TM) offers a new wet mounting carrier for the Epson V7xx/V8xx scanners and claims that with under mounting  “.. sharpness can be improved compared to other methods.”

I was intrigued about the undermount vs overmount dilemma and its potential difference on resolution of the resulting image.  Theoretically, either overmounting or undermounting wouldn’t seem to affect resolution. The single largest factors on a scanner’s ability to record with precision is the size of the light source (which is fixed on a flatbed scanner) and light scatter (a collective term to account for diffraction and reflection of light) between its source and the sensor.

Whether you overmount or undermount, the potential light scatter is the same (i.e., 2 layers of glass, 2 layers of fluid, the negative, air spaces, and the mylar. Resolution should (theoretically) be the same. But it’s possible that undermounting might be better if the mylar has significantly less post-negative scatter of the data then the carrier platen.

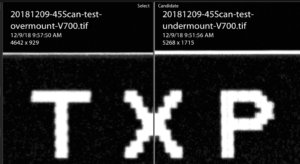
I wondered how much difference this phenomenon would make on my own V700 (wet mount with Kami fluid; neg mounted to plate glass with a  mylar overlay), and film planes equal at focal distance of my scanner. I scanned part of the film mark from a sheet of TXP 320 both ways (VueScan) at 4800 ppi. This is a screen shot from a LR comparison of the two scans; 100% view; no sharpening. On the left is the overmount scan and on the right, the undermount scan. Conclusion: No appreciable difference in resolution. 

Undermounting may have other important benefits; perhaps to reduce chromatic aberrations, but it didn’t affect resolution in my short test. I’m still intrigued, tho, and will explore further.

Other possible reasons to explain a lack of difference between overmounting and undermounting might be that other factors are limiting resolution, regardless of the configuration of the carrier system.  In my case, that could include the quality of my carrier (a piece of window glass), and internal flare.

-Carrier platen: For years I used a plain piece of window glass as my carrier platen. Because of this study, I wanted to rule out its quality being a limiting factor in image resolution. So I bought the V700 platen assembly, which includes the platen glass and holder that screws into the scanner bottom (Epson Part #1432338 housing assy., upper (includes glass), then carefully removed the glass from the assembly and set the distance to the correct focal length of the V700 lens. I re-scanned several negatives using the new glass in an undermount configuration, and then compared the results between old and new carrier platens and between overmount and undermount techniques.

Conclusion:  The benefits of the new optical glass over the old window glass were subjectively insignificant. I could not compare overmounting and undermounting using the optical glass, but that comparison was already made using the window glass, and since the optical glass and window glass were the same, I would not expect any difference between the configurations using optical glass.

-Internal flare:  Some have suggested that internal system flare caused by extraneous light (from the illuminator) around the negative might affect data quality coming from the negative. It makes sense, and Betterscanning(TM)’s new system includes a mask to apply around the negative to reduce internal system flare.  I’ve tried in the past to mask negatives using my own device, but found that it made no difference in image quality.

I recommend you test your own system of wet mounting to see if undermounting, carrier platen quality, or masking makes a difference in your scans.

See more J. Riley Stewart images here.
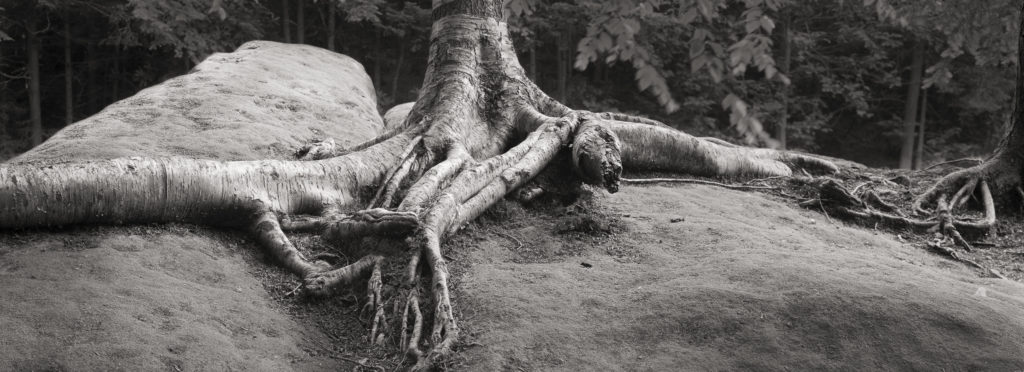
Summer is the Season for Photographing in B&W

When nature loses her colors, I focus on scenes full of shapes, shadows, and light.

Summertime can be a challenging time for taking pictures in nature. Nature’s summer colors are largely limited to yellow green vegetation and blue sky, and not much else. So at this time of year, I tend to load my film packs with Black and White (B&W) film. Let me tell you why.

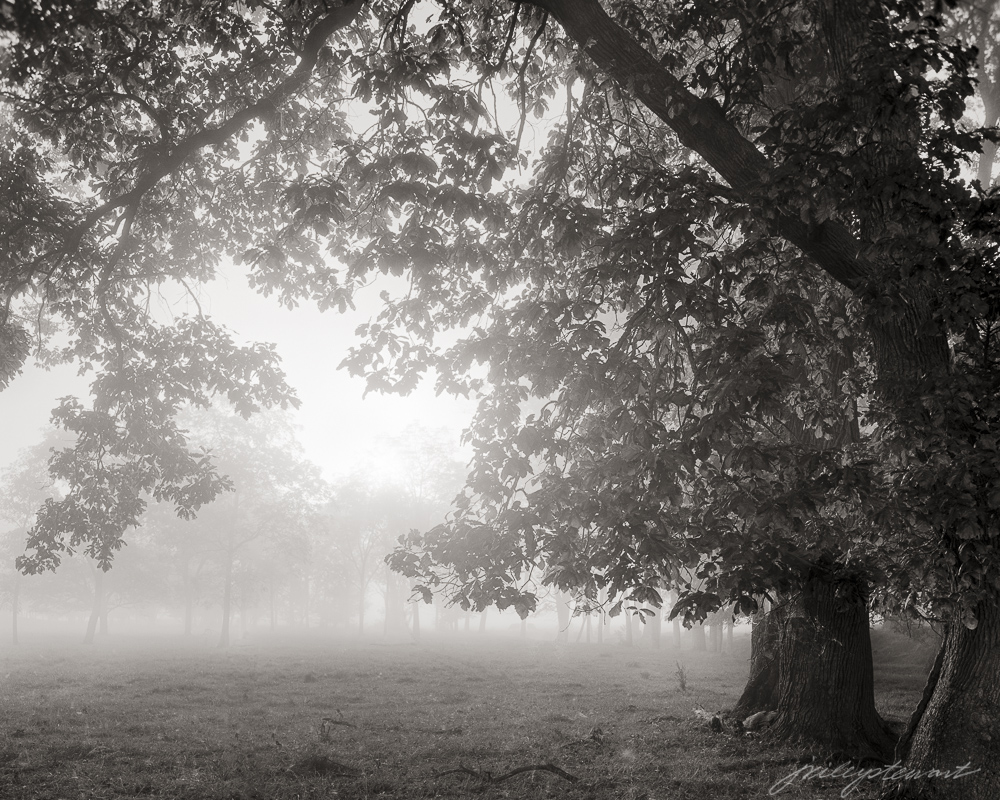
Great oaks witness a veil of summer fog.

I love B&W photographs. Nearly all of the landscape photographers who truly inspire me create in B&W.  In my opinion, it’s the absence of natural color in a B&W photograph that makes it beautiful.  Or more precisely, it’s the millions of shades of gray that make it beautiful.

My featured photograph is a good example of my ideal summertime scene. I captured “Fog in the Forest” anticipating a much different picture when I left the house that morning. The heavy fog wafting among the oaks was a happy surprise (fog anytime in Virginia is a happy surprise). The bright sunlight shining through the leaves and across the landscape created an enormous range of brightness, from very dark shadows to delicate highlights. This moment in time really fit my criteria for capturing it on B&W film: simple composition, plenty of light, plenty of shade, and a bit of mystery.

When I select a scene to capture in B&W, I’m always thinking about the grays that will be in the exhibition print, not the pure blacks or pure whites. For example, in the exhibition print of “Fog in the Forest,”  only the deepest crevices in the tree trunks are truly black; only the brightest center of the sunlight coming through the fog is truly white. Everything else is a delicate shade of gray. It’s the grays, not the black or white, that provide the realism and sense of depth in such a scene, inviting us in.

The next time you stand in front of a large B&W exhibition print, take a minute and see if you agree with me about the beauty of the grays. I’ve always thought the term “B&W” for such fine art photographs sells them short; nothing could be further from the truth.

________________________

Technical note: I captured “Fog in the Forest” on 4″x5″ B&W film along Cannonball Gate Road in Fauquier County Virginia, scanned it to extremely high resolution, and printed it on heavy 100% cotton paper using a warm-tone pigment ink set. I then hand coated the print with an archival varnish. Prints are available up to 32×40 inches, framed or unframed. This title can be found in my “Pastorals” Collection.

Timing is Everything

“Oconaluftee Sunrise”–Autumn poplars and pines absorb the warm rays of sunlight in the Great Smoky Mountains

Timing is Everything

When photographing in nature, success not only depends on where you are, but when you are.

I’ve been thinking a lot lately how important timing is to my coming home with an image on film that I can get really excited about, and more importantly an image that others will get excited about (after all, it’s all about sharing our experiences, right?)

Photographing landscapes beautifully can be as frustrating as it is rewarding. Ansel Adams once wrote: “Landscape photography can be one of the most rewarding activities, and one of the most frustrating.” Finding interesting subjects, in an unobstructed setting, with beautiful lighting, and unadulterated by Man (you know-trash, aggressive signs, ugly junk, etc) is rarer than most people think it is.

I love the part of my work that I call “the hunt.” In landscape photography, this involves driving around until I find something that tells an interesting story; not unlike an eagle soaring above in search of prey. And, like an eagle, sometimes I come home with bounty, and sometimes not. I’ve driven around for hours, pumped with inspiration and motivation, my eyes constantly peeled and ready to discover something new, only to pull into my driveway at the end of the hunt without having taken a single photograph. I’ve just become a hungry eagle.

Even when I find an interesting story in the landscape, I’m very picky when deciding whether to stop and take a picture or not.

Because I use larger format film to capture my scenics, ‘taking a picture’ requires a significant commitment on my part.  If I decide to photograph a particular scene, I’ll spend at least 30 minutes at that one spot, and often much longer. During that time, almost everything in front of my camera can change (and thus, so can the story): the sunlight can become too harsh or too subdued, calm wind can become breezy, dry conditions can turn to rainy and wet, etc, etc. Mother Nature has a mind of her own, and she is the author of the story.

The scene in “Oconaluftee Sunrise” (above) happened when my timing was in synch with Mother Nature’s, God bless her heart. I’d been to this site before; it’s one of my favorite in the Smoky Mountains. On this particular morning, I arrived before sunrise, not knowing what to expect. Some sunrises are really bland; some are glorious.

After a several minutes scoping on this particular morning, I noticed how the veiled sunlight began breaking through the clouds and spotlighting the fall colors of the trees lining the distant hillside. During just a very few moments, the lighting became intense and made this scene possible. Just as quickly, the colors of the sky and of the trees became muted and washed out.  It was a perfect time; one that I wouldn’t have experienced (or photographed) had I been a bit less patient with Mother Nature.

Like I said, ….timing is everything.

My point is this:  Any art photographer can follow all the rules and still walk away without the “money shot.”  He/She can be at the most beautiful, interesting spot on Earth, during the “golden hour’ surrounding sunrise or sunset, with all the best gear, full of inspiration, and still walk away with nothing except the experience.  So many things beyond our control can totally freak up all our plans to make something beautiful.  I’m learning to accept this risk, enjoy the experience for what it has to offer, and not get so hung up about  missing something that never was meant to be. Patience with Mother Nature will only get you so far…after all, there are more adventures and other opportunities just down the road. Take them as you find them, when you find them.