This is a quick comparison of how VueScan and Epson Scan produce high quality images from negative film. I’m not a scanning or film services vendor; I’m just a film user who tries to get the most from his tools, and believes this information may be helpful to others who feel the same.
Introduction
You’ve gone to all the trouble to set the right exposure and composition in your film camera. You’ve been really careful developing the film. Now it comes time to scan the negatives, and it could all fall apart unless you know the ins and outs of your scanner software.
But that’s all automatic, isn’t it?? Isn’t all scanning software the same?
I admit it’s a rhetorical question. Of course they’re not the same, in some of the most important aspects, including the ability to fully manage the scanner and make it do what you need it to do: Get all the detail possible from the negative without clipping (or dumping) the shadows and without clipping the highlights.
Well, you say, if the exposure is perfect and the development is perfect, won’t any scanning software accomplish the same thing? And my reply is… theoretically. But anytime you deviate (intentionally or unintentionally) from the ideal situation, such as pulling or pushing film, or departing from normal development time or temperature (or developer formulation), or missing the exposure reading by a 1/2 stop or so because of an aging light meter, then all bets are off. So you need a scanning software program that can direct the scanner to ‘record’ all the grains of silver in as many situations as possible. Or, you can continue throwing useful negatives away based on imperfect scans.
If you think about all the images (and/or negatives) you’ve trashed because the shadows were dumped or the highlights clipped once scanned, it might be time to question your scanning software and how you’re using it.
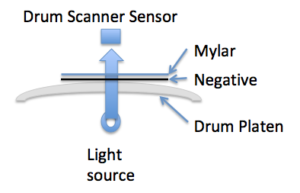
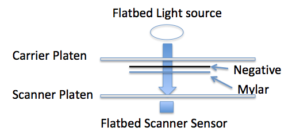
But first, you’ll need to trust that most modern scanners are highly capable machines. My 10 year old Epson V700 (rated at DMax 4.0) can easily record tonal differences between film base + fog (FB+F)(0% Luminance, L) and an adjacent shadow luminance of 0.1% L. It can record differences in the highlights contained WITHIN the brightest specular highlight, recording separate tones on a negative within a specular highlight of 100% L at the center and 99.7% L from a peripheral area of the same specular highlight. The dynamic range of my V700 easily records metered values from 2EV (I’ve got a bit of flare in my Sekonic meter) and >18 EV, and it’s all captured on my negatives and, most importantly, in my scanned images.
Of course, such fine differentiation won’t matter in a print except to create smooth tonal transitions and discernible shadow and highlight textures, which are important to fine art prints of large size. If your scanner (or how you’re using it) can’t differentiate very fine differences (which are actually delicate transitions) in film densities on the negative, no amount of processing and/or printing expertise will overcome that shortfall.
Let’s compare scans from VueScan® and Epson Scan®.
I know lots of photographers who use film. I know none (except myself) who use VueScan (from https://www.hamrick.com/). Most if not all of them use Epson Scan that came with their scanner.
Before I get into this, let me say that I’m not associated with VueScan nor Epson in any way. What I share here is only from the perspective of a user, okay?
My strong preference is for VueScan because of its much greater capability to direct the V700 (or many other scanners) to read negatives having vastly different levels of density, contrast, color, and grain structure. I’ll cover some of those capabilities below.
I have rarely used Epson Scan. I think it’s grossly simplistic and constraining to users who want to get the most from their negatives. And even though its User Manual doesn’t even cover any of its so-called advanced adjustments for levels or curves, I’ve experimented enough with them to feel okay about sharing my experiences with Epson Scan.
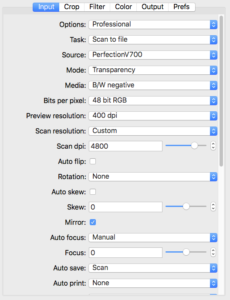
On the contrary, I’ve used ViewScan for years, and have scanned several hundreds of negatives, both B&W and color. Its User Manual is thorough, and it needs to be because of the comprehensive range of settings available for a great number of scanner models. I’ve already covered my basic approach to getting the most from my negatives in this article, so I won’t go into them again. Regardless, my approach is merely a starting point and you’ll want to experiment and develop your own workflow.
For this article, I’ll use a single negative having an extreme range of subject brightness (EV -5 to +6, not including specular highlight reading). I scanned the same negative using both VueScan and Epson Scan, each optimized to record as much of the density range in the negative as possible.
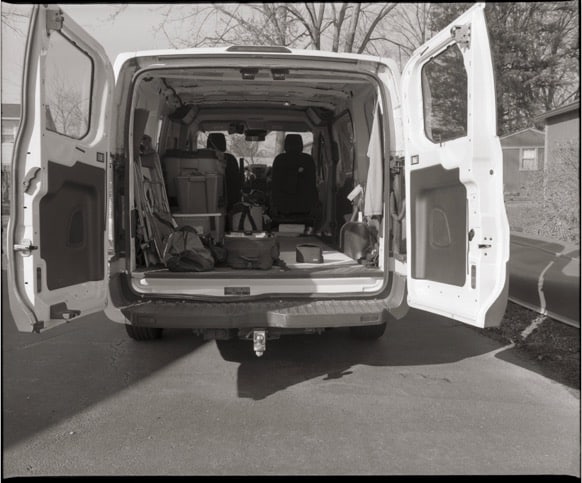
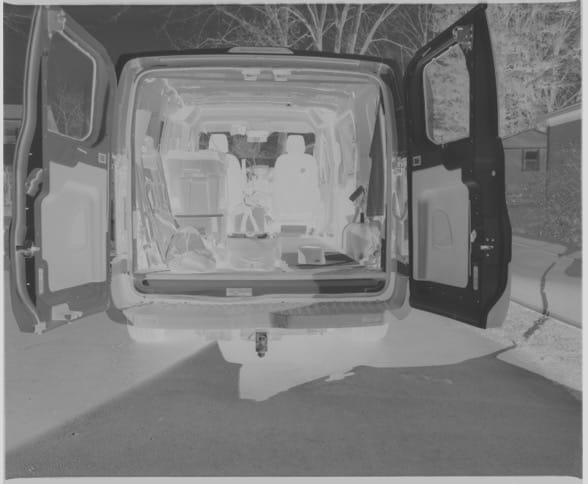
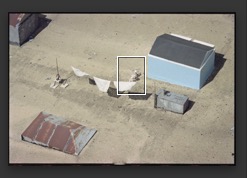
The scene is test scene I use routinely to quality check my workflow. I’m lucky to have a pure white van. When I open the rear doors on a sunny day, I get a composition having a full scale of brightness ranges, from the deep shadows within the van to the bright highlights (including specular highlights) on the exterior. I exposed TMY rated at 400 by metering the passenger seat up front and placing that EV on -2 (i.e., Zone 3). The brightest reflections from the white paint, not including the linear and specular highlights fell on EV +6 (i.e., Zone XI) using my Sekonic 758. Of course, the specular highlights, if I were to try to measure them specifically, would likely fall around EV +9 or above (or Zone 14).
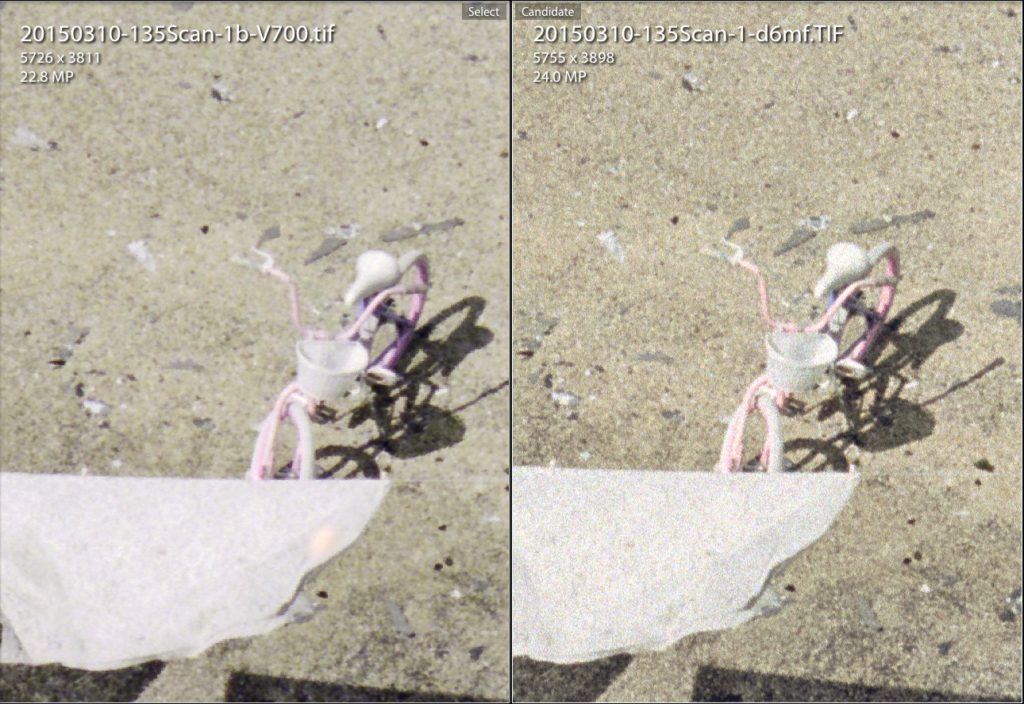
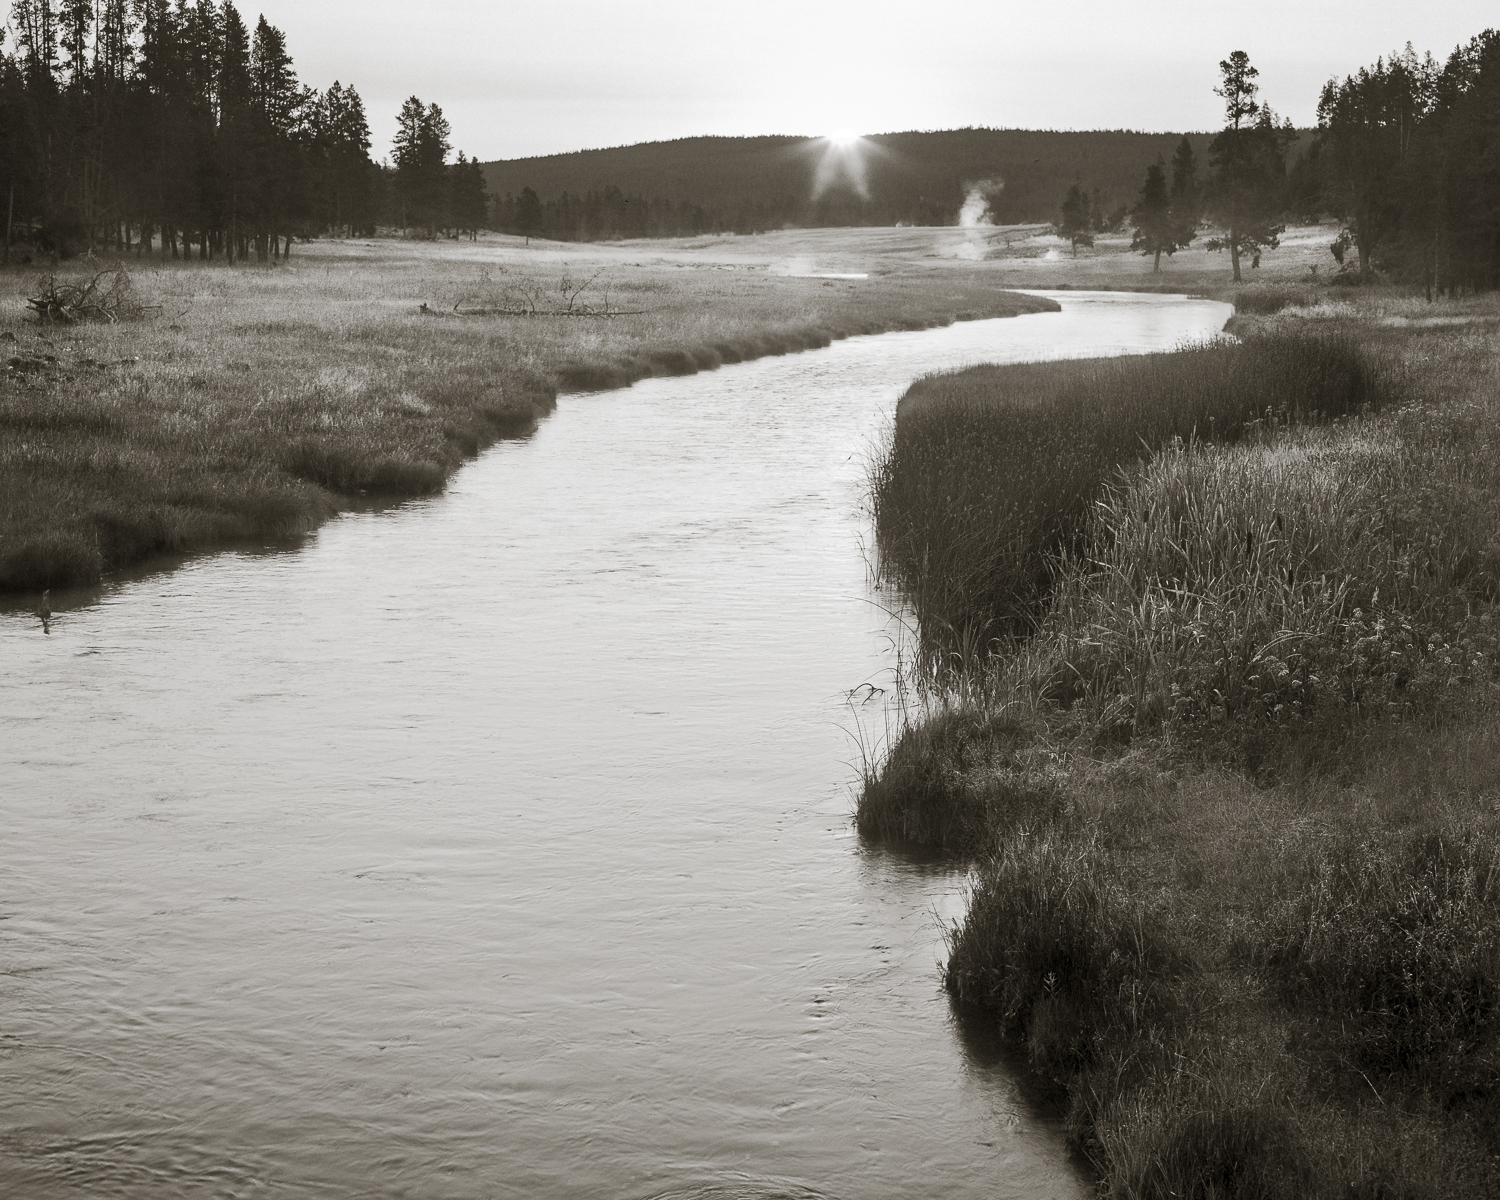
Below is a picture of the scene and the negative made from it. The luminance range was extreme: from fine shadows in the cargo area of the van to very high and specular highlights on the sunlit areas of white paint. The goal in exposure, development, and scanning is to retain every bit of density range above the film base + fog into useable information for processing the negative, without clipping!
Ok, it’s a difficult negative due to the extreme density ranges, but let’s compare the optimized scans using VueScan and Epson Scan to see if there are significant differences in the image produced.
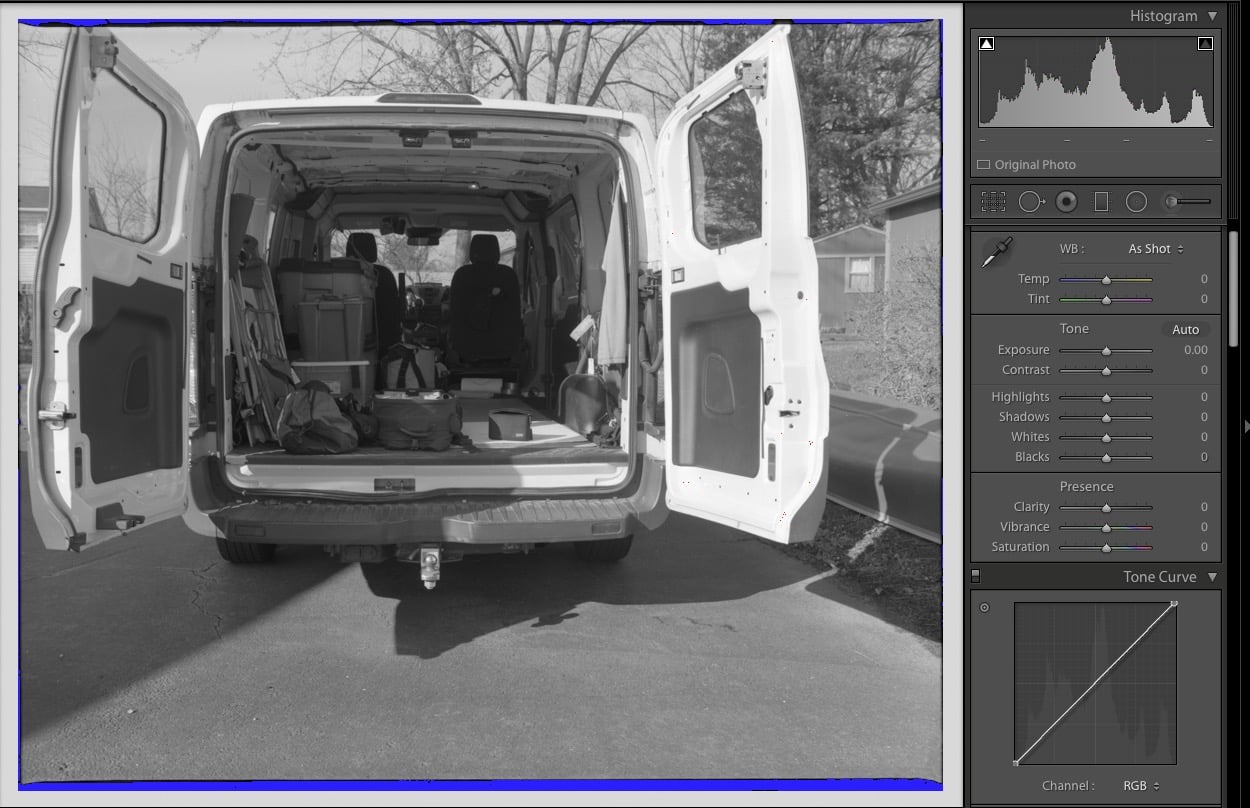
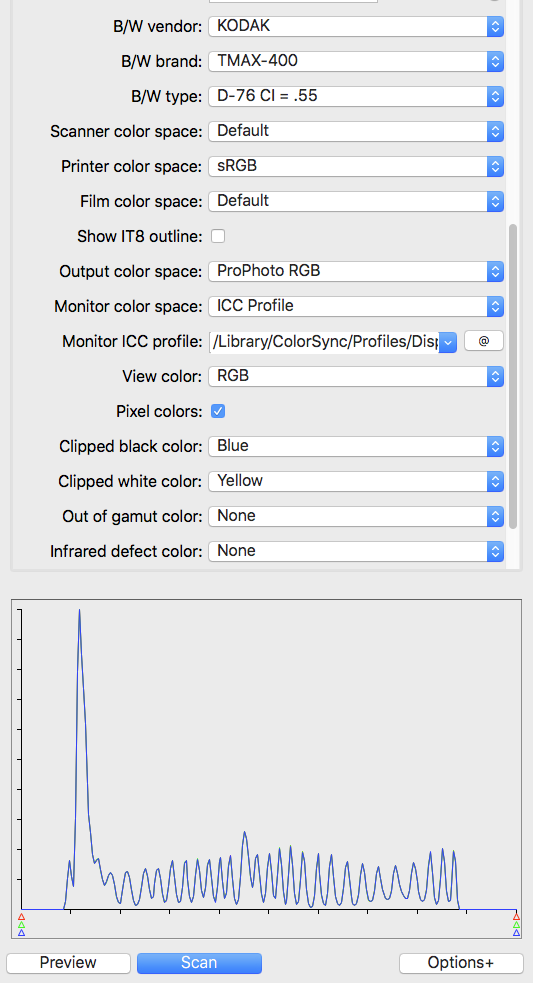
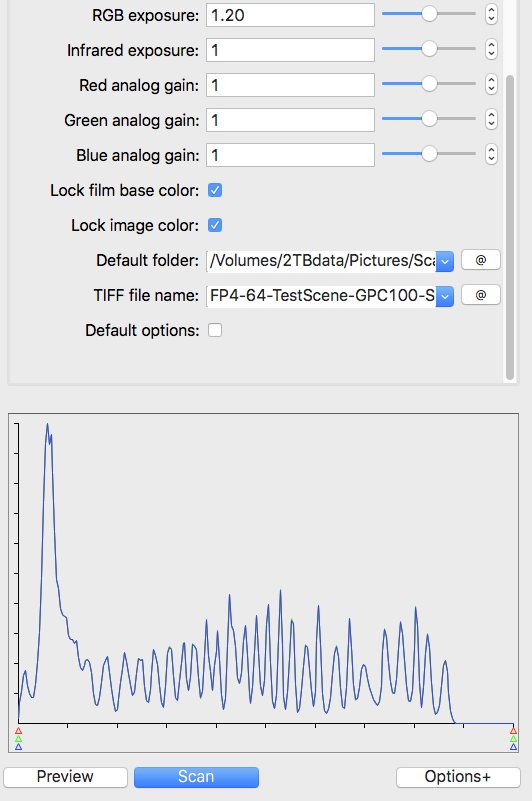
VueScan Record
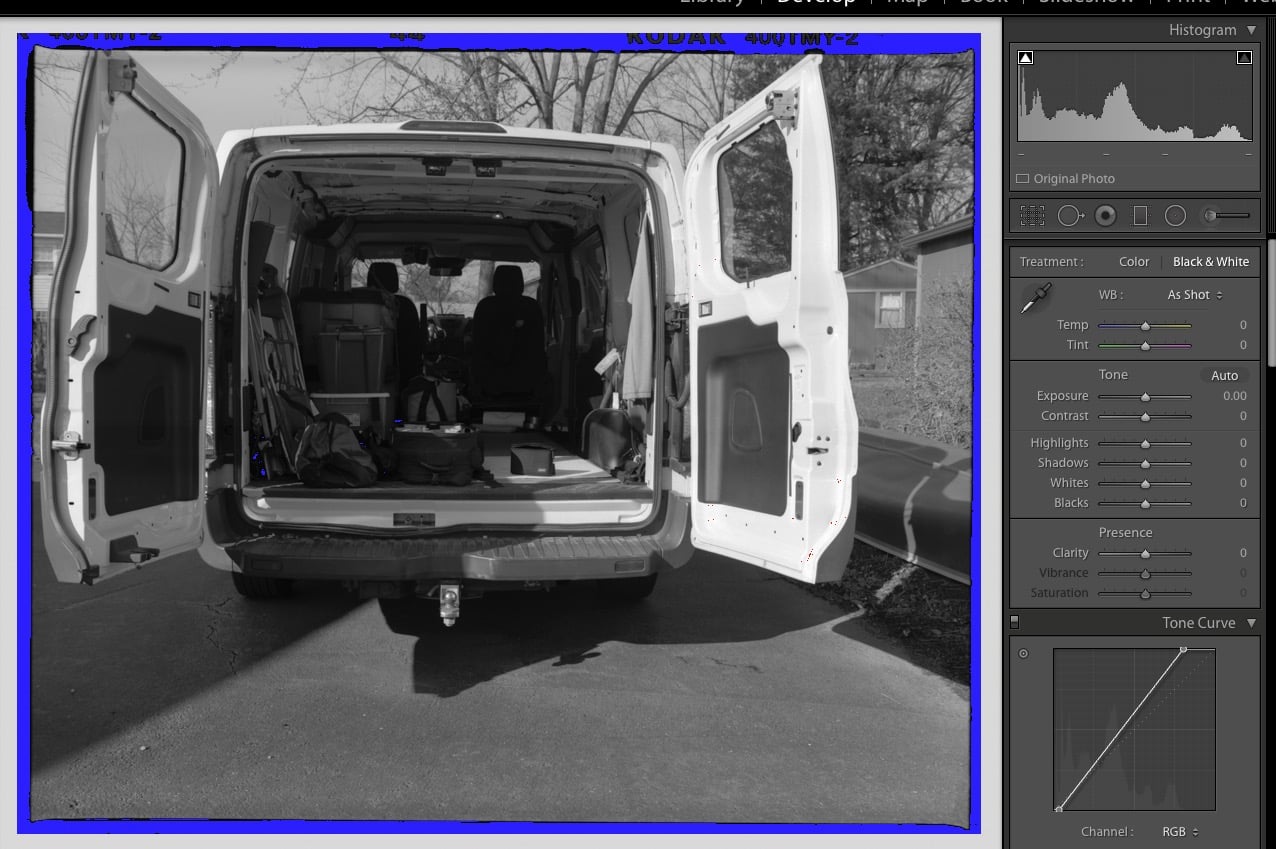
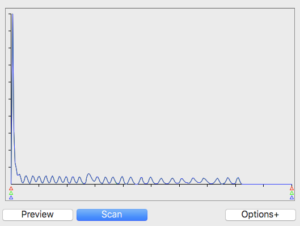
Epson Scan Record
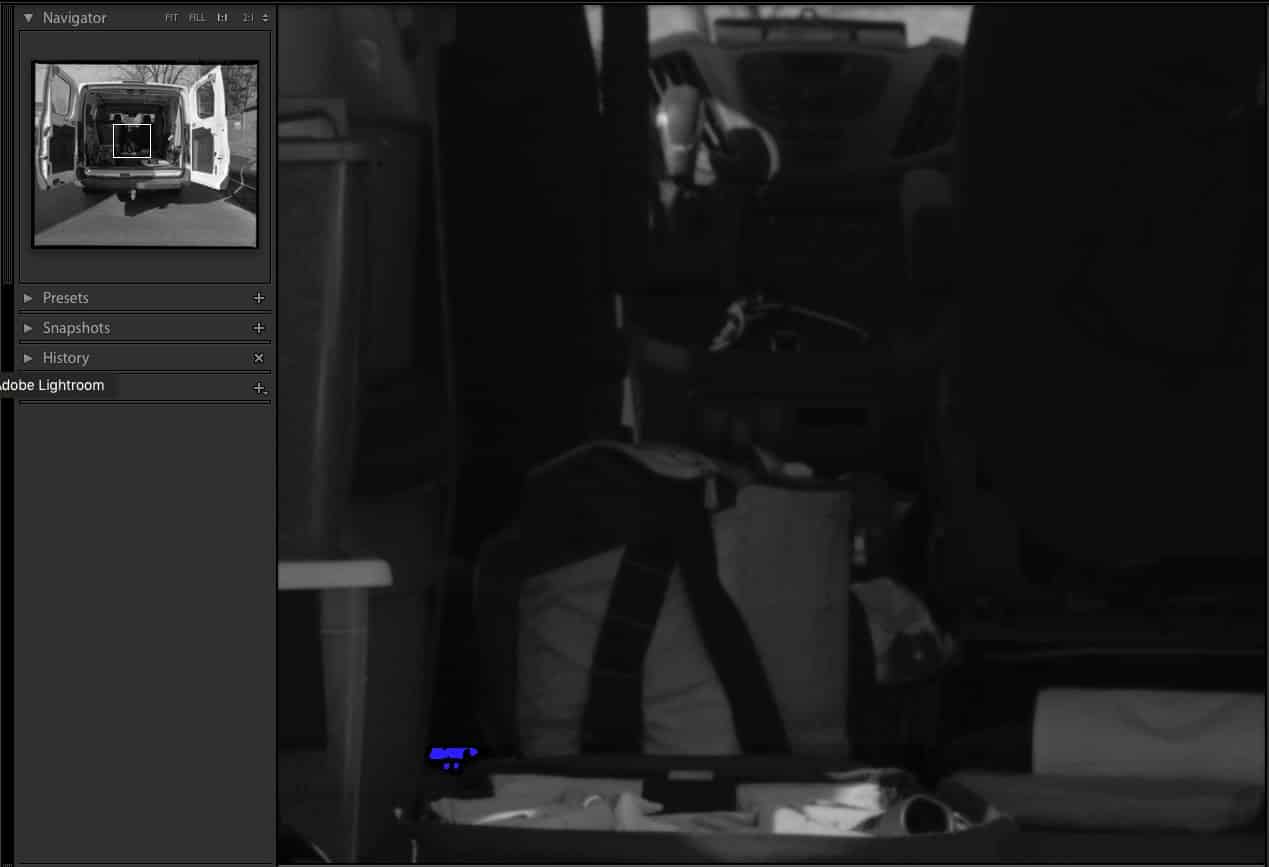
Shadow Detail Results

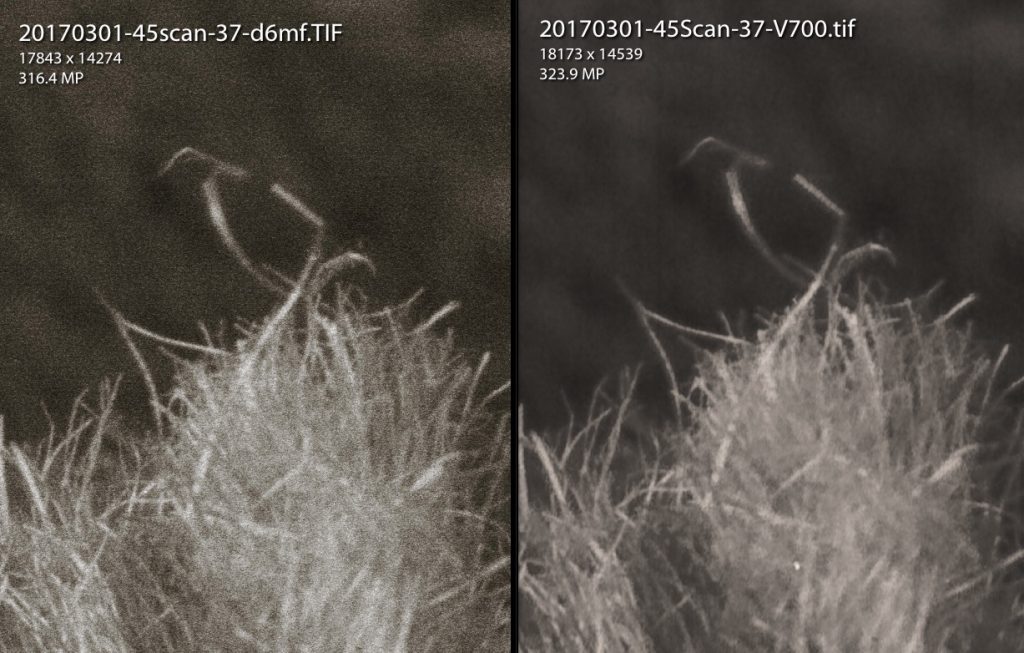
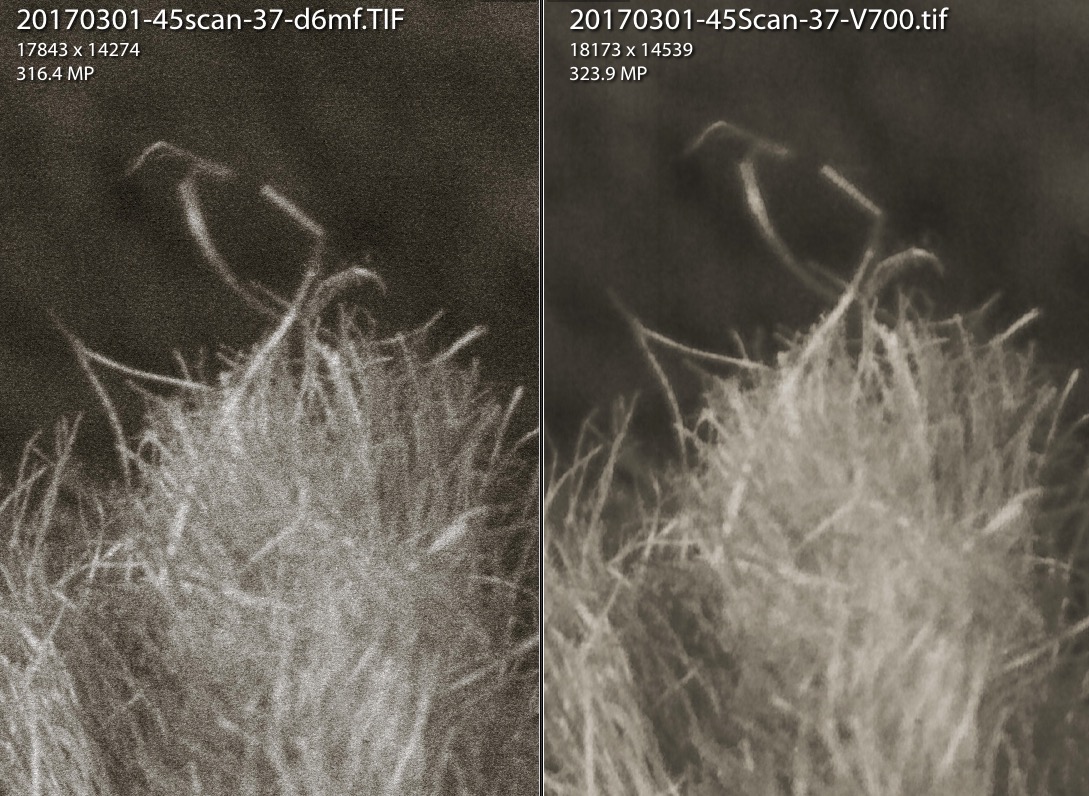
Comparison
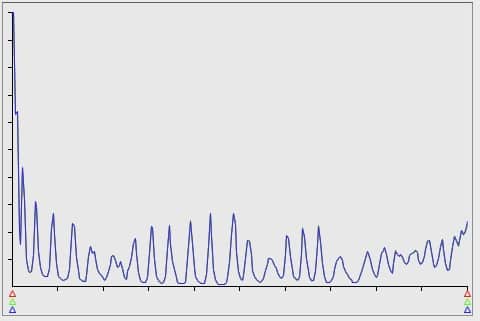
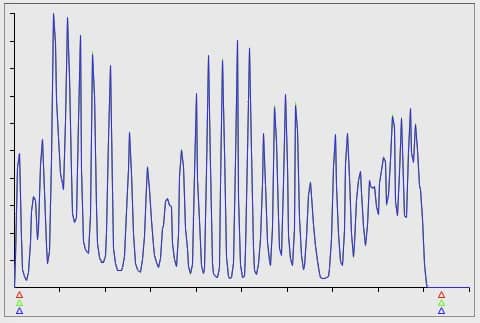
Even though the levels and histogram settings for both scanning software was intentional to avoid clipping black and white points, this was much more difficult using Epson Scan due to its user interface (or perhaps my inexperience with Epson Scan). Regardless of the fact that I had to adjust levels in LR6 to make a comparison to the VueScan image, it was clear that Epson Scan compressed shadow detail, even to the point of losing details below Zone IV. While the histogram for the VueScan image was nicely evenly spread out, the histogram for the EpsonScan image pushed nearly all shadow densities to the left.
The effect of this was particularly obvious in the 1:1 details of the same shadow area on the negative. Compared to the VueScan image, the tones of the passenger seat back and much of dashboard became completely featureless. Note these values weren’t clipped, merely compressed, by Epson Scan.
Both Epson Scan and VueScan treated highlights about the same. VueScan treated the highlights with slightly less aliasing of the grain clumps, creating more pleasing transitions across highlight tones.
Wrapping Up
If I were a photographer tied to Epson Scan as my sole tool to convert negatives into digital images, I probably would have thrown the test image described in this article in the trash after scanning it. Even after adjusting levels and curves to get the most information from the negative, Epson Scan’s inability to record shadow densities gave poor results. Where my light meter differentiated relative exposure values (rEV) between 0 (Zone V) and -3 (Zone 2), Epson Scan dumped Zone V to Zone IV and compressed Zones III, II, and I all into about Zone I (no discernible detail). This is a subjective conclusion more than objective.
Being confronted with the Epson Scan result, a smart photographer would go back to his ISO and film development workflow to try to get better separation of the shadows by shooting at less than film box speed and tweaking development time to compress highlight densities to avoid clipping. Sound familiar?
It’s possible that so many photographers recommend shooting film at 1-2 stops less than box film speed is because of scanning failures more than shooting failures. Without being able to fully control the scanner, via the right software, you’re left with settings and electronic algorithms developed by engineers, not photographers, and they develop them based on rather ideal shooting/developing scenarios that are actually quite rare in practice.
I used this extremely challenging scene to learn more about the differences in scanning between VueScan and Epson Scan scanning software. The negative was perfectly exposed and developed. The scan using VueScan was fairly straightforward and required very little adjustment to my normal scanning workflow. It gave me a image having useable information from Zone 1(L*=4.4) to Zone X (L*=100). The negative itself did not challenge the capacity of the scanner to record this wide range of densities (i.e., no clipping low or high).
This direct comparison between VueScan and Epson Scan indicated a couple things. First, the two software programs do not read or record the same negative equally, even after optimizing the levels pre-scan. Second, built-in settings are locked from the user in Epson Scan. Unlike Epson Scan, VueScan permits directing the scanner to adjust Exposure, RGB Gains, Film base colors, and Image color to tailor the scanning process to any individual negative. This flexibility is a great enabler when scanning any challenging negative.
The most obvious explanation for the difference between EpsonScan and VueScan might be their use of a different gamma correction built into the software, but I think it goes way beyond that. I’m working on a Mac and routinely rely on the native Mac gamma setting of 2.2. Adjusting the VueScan curve in LR to represent a decreased gamma created a histogram much like the Epson Scan histogram. However, adjusting the Epson Scan curve in LR to mimic the VueScan histogram was not possible. The lost detail in the deepest shadows was still missing, and the shadow contrast too severe. It might be that an adequate correction before scanning in Epson Scan could give better results.
I’ll leave you with this: Get to know your scanning software; scanning software matters. If your current program doesn’t let you manually adjust settings like Exposure, Levels, Curves, RGB Gains, FB+F color, and Image color, try VueScan or other program that does. Modern scanners are highly capable machines, but if you’re tied to an engineer’s guess as to what you actually need, you may not be getting everything you paid for, or that you need.


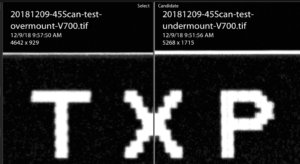


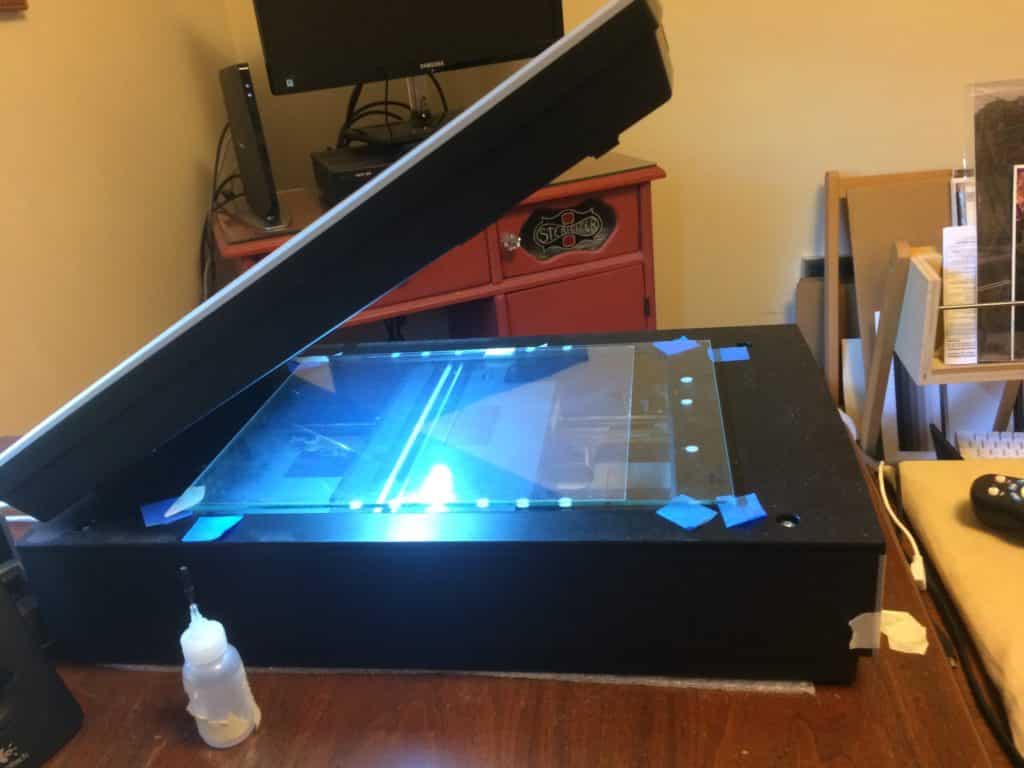
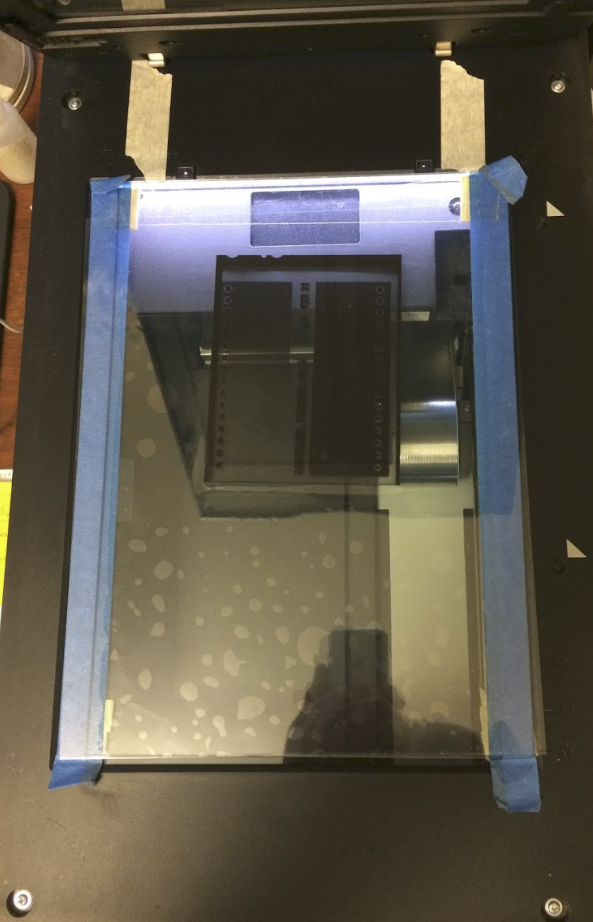
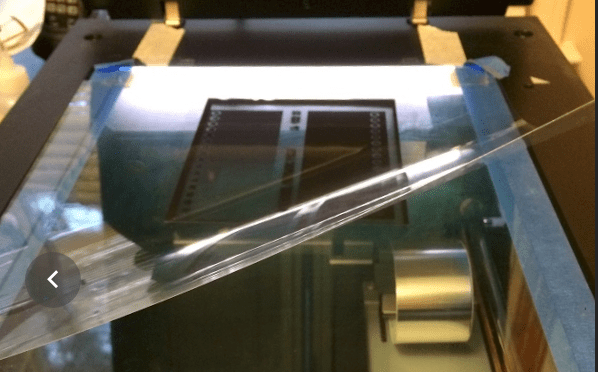
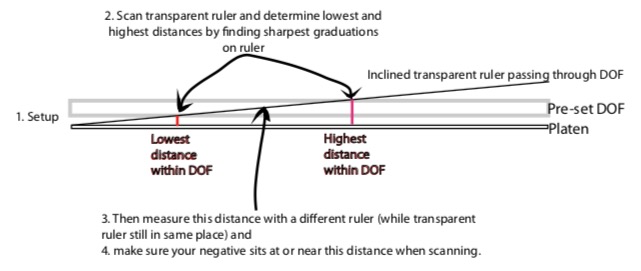
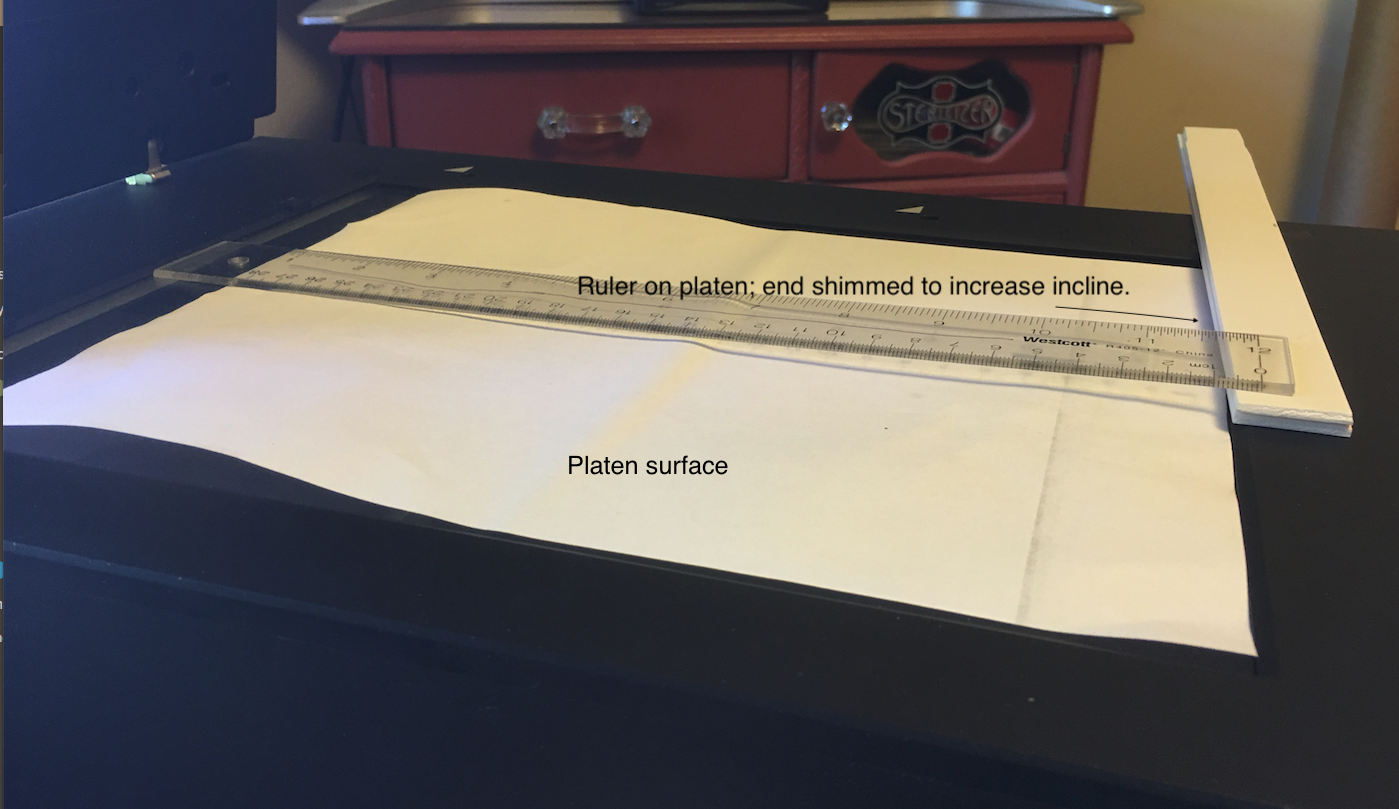
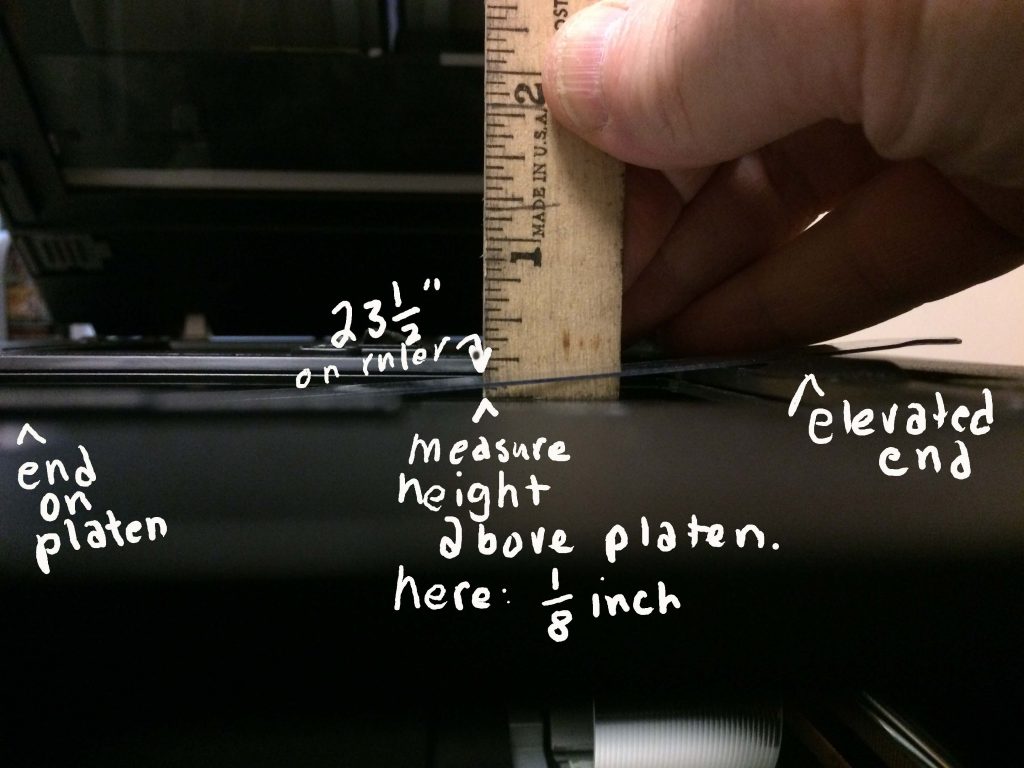
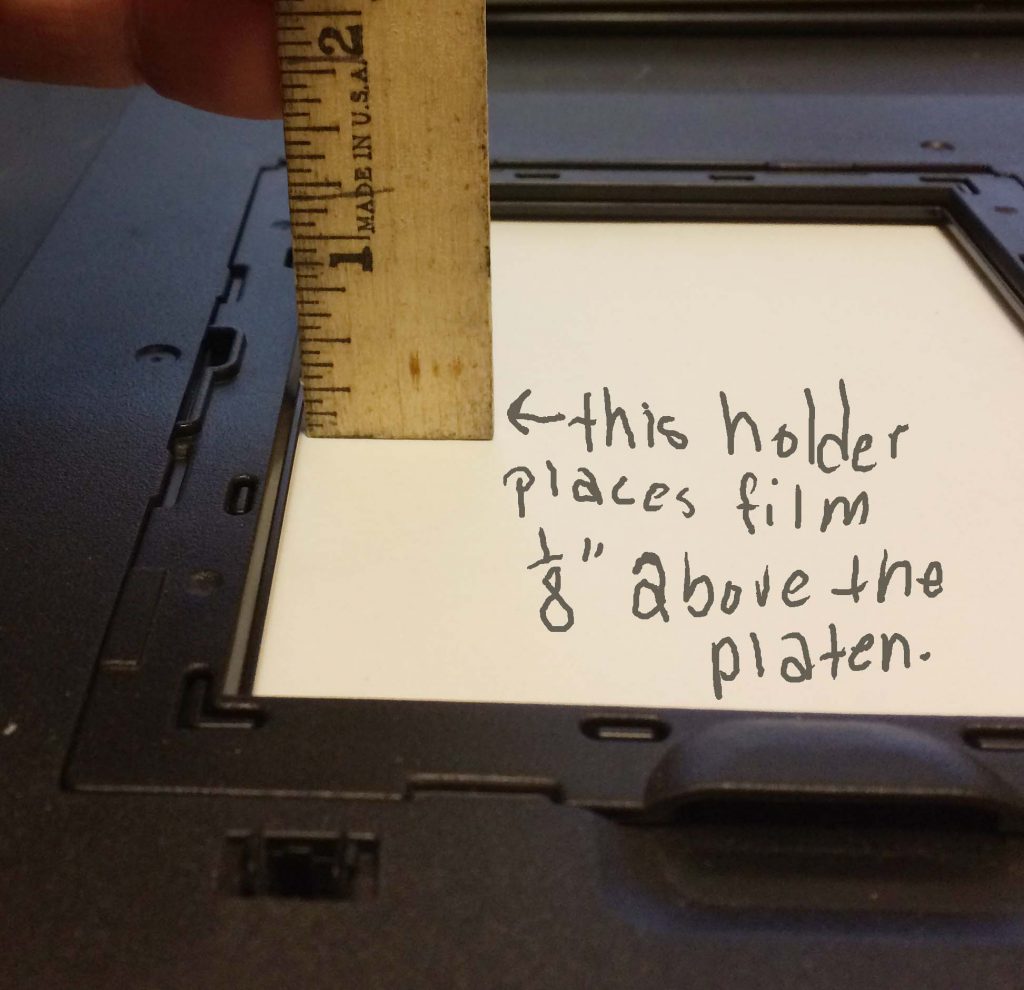
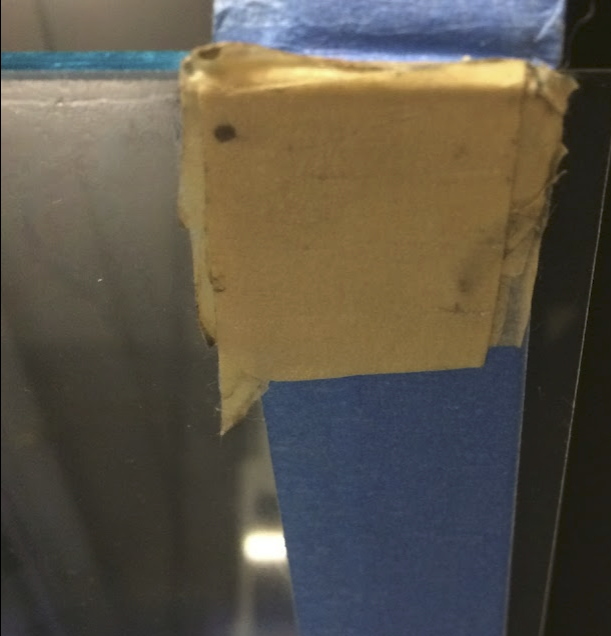 5.b. Alternative: If the new glass carrier doesn’t fit inside the scanner platen window, sitting directly on the platen, you’ll need to adjust the height of the new glass carrier to place the underside of the carrier at the focal point of the scanner lens, and use the Undermount design. In my hands, this required several layers of tape placed directly on the top assembly of the V700. But any way to accomplish the same thing is fine.