Why Scan Film?
This tutorial covers how I manage my film scanning to get every bit of tonal information from a negative and avoid clipped shadows and highlights, which ensures I get great scans from my film images.
Scanning film is a necessary evil if you shoot using film cameras and want to convert the film image into digital format for proofing, sharing to the web, making a digital negative for alternative processes, or for inkjet printing. Scanning film requires a special machine (a transparency scanner) that passes light through the film and to the scanner’s sensor, and records minute differences in density and color at millions of sampling points on the film, and records those differences in a digital file.
For some images on film, we can relay on automatic settings in scanning software to adequately read and convert the film image to an acceptable digital image. But there will always be those film images that fail miserably during scanning; automatic settings and presets just can’t provide a digital image that we can process into a fine image for printing or sharing. For those film images, we need to learn how to force the scanner and scanner software to do the best job possible to get all the useful information from the film.
Software can make a big difference in user experience. I’ve tried Epson Scan®, SilverFast®, and VueScan®. By far, I’ve found VueScan is the most flexible and effective, and what I say below relates to its use. VueScan, because it includes so many controls for so many scanners, can be frustrating to use sometimes, but if you follow my workflow, and refrain from experimenting too much, you’ll be okay (I think). Try VueScan® here: (I have no association with it). I have no doubt that if all your negatives (color or B&W) are perfectly exposed and developed, you won’t need the advanced tools built into VueScan (however, it will take care of those too) and so the basic scanning software like Epson Scan will work fine. But there are those times when things don’t go as planned, and you’re left with a great composition on a crappy negative. That’s when you need the tools and the skill to get every bit of useful information from the negative before you can make a great image. I’ve compared Epson Scan to VueScan in scanning B&W film here. Take a read if interested.
Take Home Points
- Scanning film is a craft that requires learning, but folks, it’s not rocket science. You don’t need a degree in scanning to get the job done.
- Scanning film is a technical task. There is little usefulness for creativity during scanning.
- Don’t ask too much of your scanner and scanning software: it’s only good for one thing, and that’s to get every bit of useful information from the film image as is possible.
- There is no reason a properly exposed and developed negative can’t be scanned without clipping any shadow details or any delicate highlights, even specular highlights. But to scan some film images, you must know how to control the scanner and its software.
Unleashing the power of the film scanner
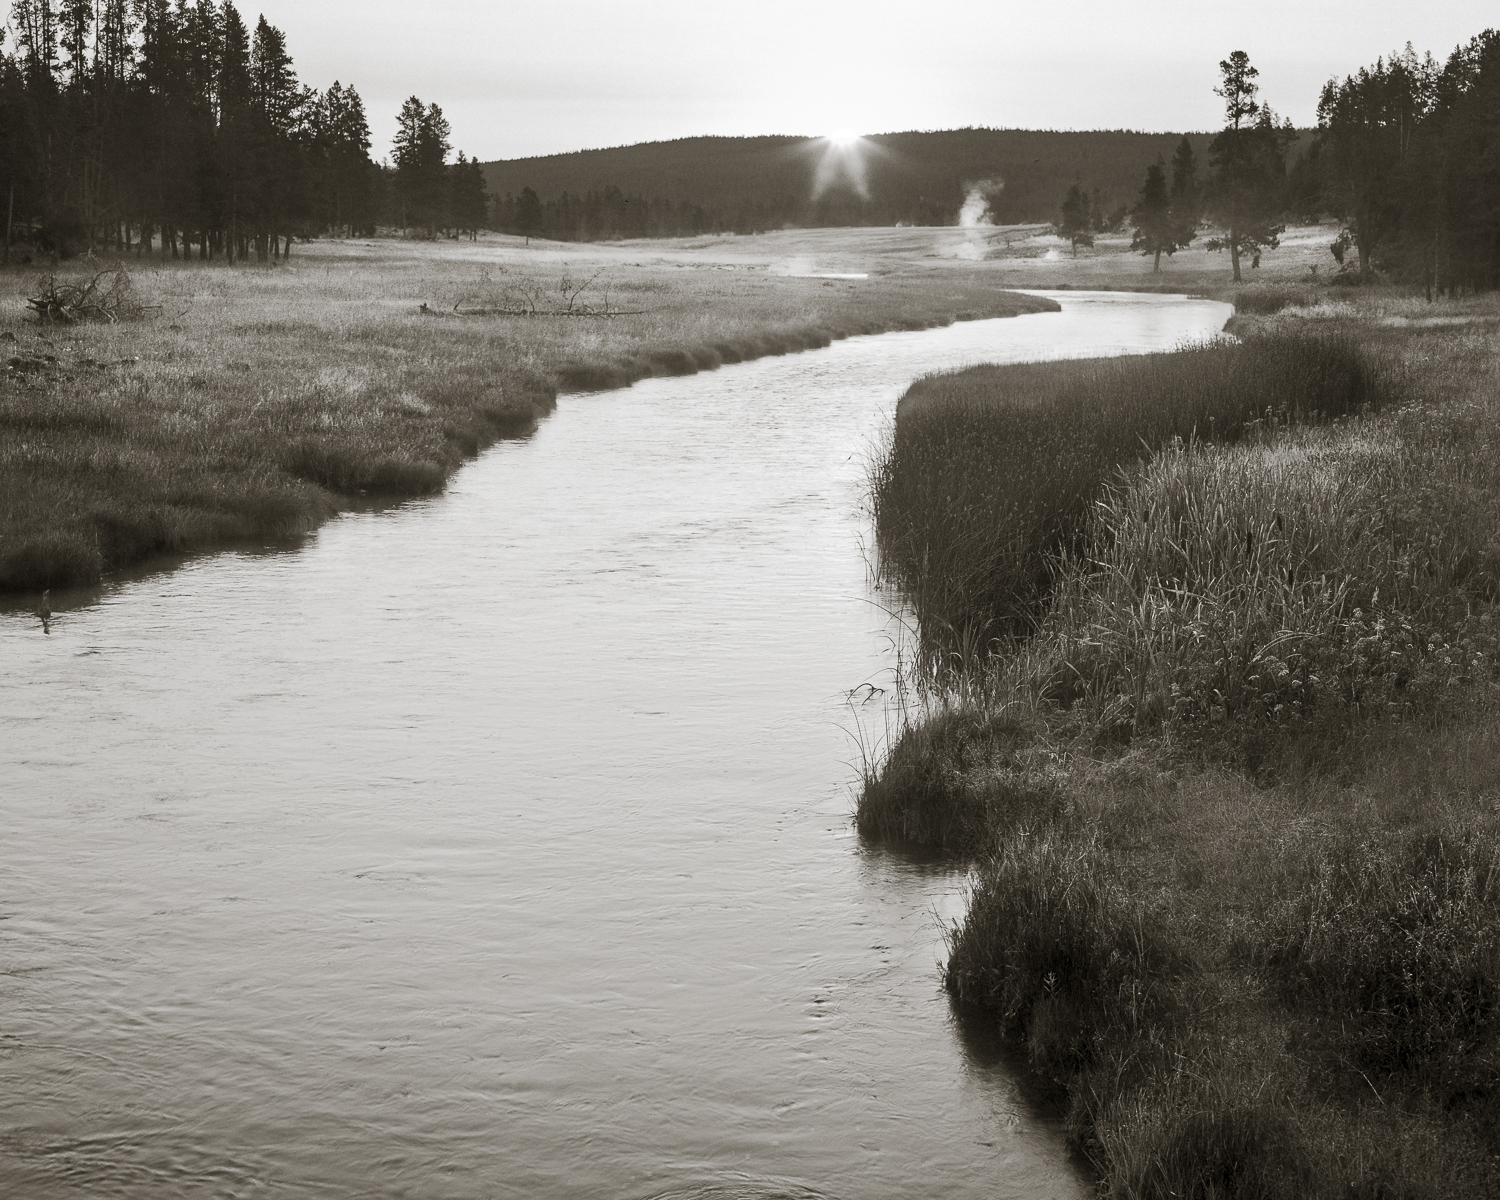
The image above (“A Moment On the Nez Perce River”) is an example from a scene having extreme dynamic range that can give automatic scanner settings the fits. Automatic scanner settings will often assume a perfectly exposed negative, perfectly developed negative, a ‘common’ film or type of film, a ‘common’ type of scene, and/or it assumes you want sharpening, dust removal, color balance, resolution, and any number of other assumptions. Perfect rarely happens in real life photography.
Scanning film is a technical task. There is little room for creativity, so don’t try to make it that. But, because it’s technical, realize that you must control the machine (i.e., the scanner and its software) to get the most out of it. Luckily, controlling the machine isn’t difficult if you use the right scanning software. Like any consumer machine, its controlling software has built-in defaults and automatic settings for folks who just want something fast. If you’re serious about getting great scans, you need to know to turn off all/most of the built-in presets.
Effective Scanning Workflow (VueScan®)
Initial settings:
I scan the negative as a negative, both for color and B&W films. I sometimes deviate from this with color negatives I’m having issues with, but that’s not common. Here’s my initial settings in VueScan using my Epson V700.
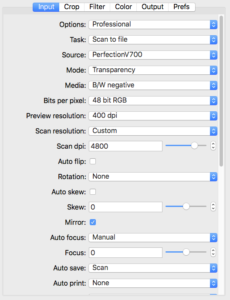
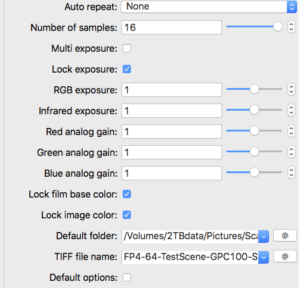
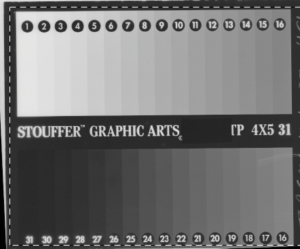
Using these settings, click <Preview> and it will give a quick scan of the negative converted to a positive (like normal). Here’s what I’m scanning. It’s a Kodak Tri-X negative that’s been exposed through a Stouffer’s Step Wedge®. The step wedge has a minimum optical density at step 1 of 0.05 and a max density at step 31 of 3.05 in 1/3 stop increments. So it can mimic a scene having exactly 10 stops of luminance range. Much of this is altered by negative development, which I won’t discuss here. The step wedge is merely a tool I’m using here to give you a standard ‘negative’ to talk about. Development of the negative can alter the actual densities from those 10 stops of light (i.e., by pushing or pulling exposure and development). But you’ll notice that while the darkest step (Step 31) is nearly black, the lightest step (Step 1) is far from pure white. The Epson V700 scanner has the latitude to record the 10 stops of density on film, and so does yours, probably.
Now the fun starts. We’ll set the scanner to capture every bit of information from a negative having 10 stops of density range (and more).
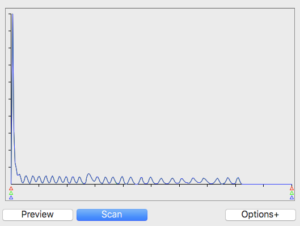
This is a histogram VueScan produces using these initial settings. You can change this histogram (and the resulting image) remarkably by adjusting certain settings. I’ll show you.
The initial histogram produced an image from 0% Luminance (L) to Zone VIII (82% L) above film-base + fog (FB+F). Shadows are on the left; highlights are on the right, just like a normal histogram. I count 27 separate peaks, including all tones that are combined within the largest peak at the far left of the histogram. So, I’ve lost 4-5 stops in the shadow areas of the step wedge negative. If I printed this image as scanned, it would clip the darkest 6 zones or so to black. That’s not good enough for me, and it’s important to know that we can get more information from the shadows than the initial scan provided.
You probably know that film development modifies the overall contrast of densities on the film. The measure of contrast is called the Contrast Index (CI). The more development you give a specific film, the greater its CI will be, normally from 0.4 (low contrast negative) to 0.8 (very contrasty) or so. Vuescan includes several models (target film profiles), including many that enable matching of actual negative CI to model CI for B&W films. Go into the <COLOR> tab and you’ll see you can change the target film profile to several “model” renderings. The initial histogram above shows a <Generic Color Negative> model even tho I’m scanning a B&W step wedge.
You can experiment with varying film models under the <Color> tab. I like the Kodak TMAX 400 model as it allows me to select different contrast index (CI) levels so that I can better capture the shadows and highlights. Below is exactly the same scan, but using a different setting in the <COLOR> tab.
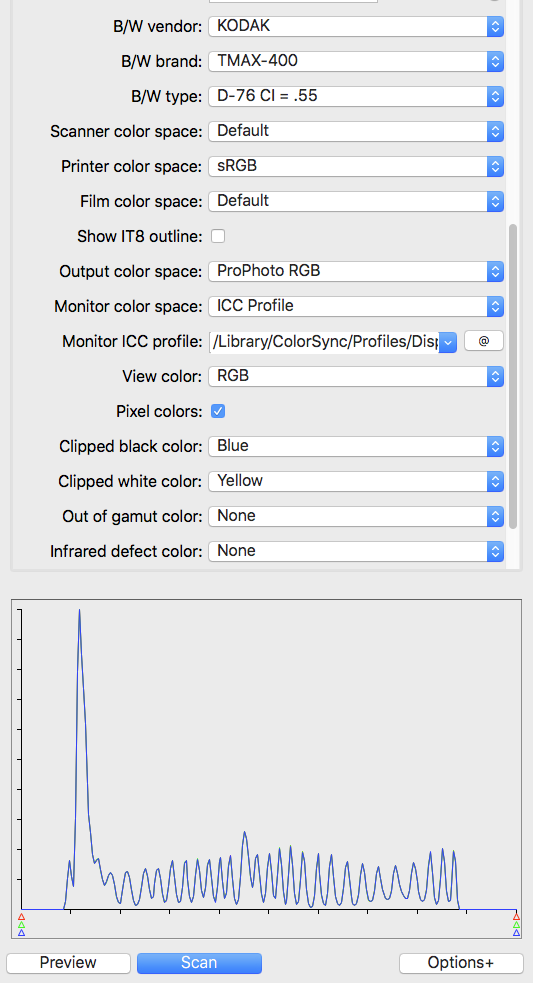
You notice the left and right side of the range are now completely inside the extremes (levels) shown by the little red-green-blue triangles. You can stop here and be assured you’re getting every bit of data from the negative, with plenty of room to adjust levels and curves in post without clipping.
If I do anything beyond this, it’s to set RGB Exposure (<Input> tab) to move the film FB+F peaks as far left as possible without clipping any important shadows. I want to eliminate FB+F as it has no useful information. In other words, during scanning I want to “expose to the left,” just the opposite of shooting a digital camera. Remember that when scanning a negative, digital noise (if any) will occur on the far left of the histogram, where negative densities are least. So don’t be too aggressive about this setting; don’t move your deepest important shadows too far to the left. When done right, you should still still the FB+F peak.
Setting RGB Exposure in VueScan is the one of the pre-scan settings (i.e, machine settings) you can select on the Epson Vxx models. VueScan is the only software I’ve tried that is able to direct the scanner to slow the light emitter bar based on the RGB Exposure setting. All other adjustments you make in software is performed on the image after scanning it, similar to PS or Lightroom does, which adjusts pixels and can cause artifacts. So there’s value in adjusting the RGB exposure to fit the negative.
The other important machine setting enabled by VueScan is the R-G-B analog gain controls that can become important when scanning color films. Film models will often presume specific R-G-B gain settings, so you need to check to see if those settings are causing your histogram to ‘dump’ tones.
Below is the exact same negative scanned using 20% more exposure so that the film base plus fog (FB+F) falls as near to the left as possible: That first little peak is FB+F.
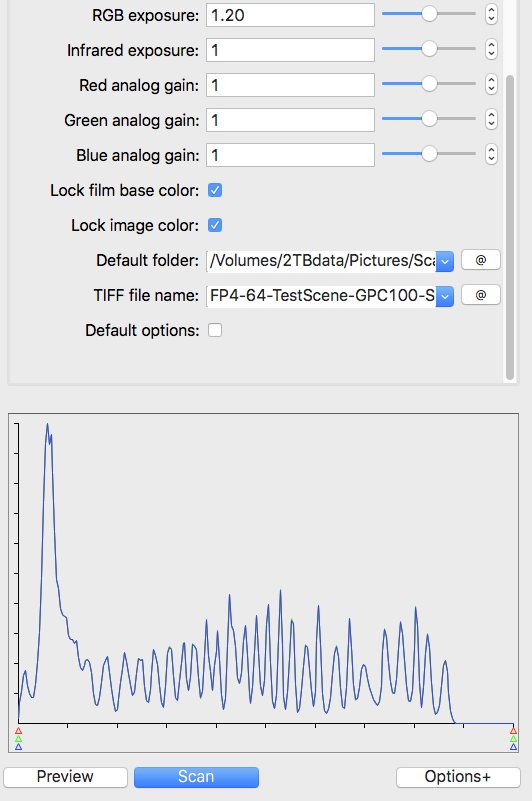
To recap, I’ve selected a film model that gets the shadows away from the left edge so I can clearly differentiate their peaks on the histogram, then I’ve increased RGB Exposure to ease them back to the left without clipping any important shadows (FB+F is not important).
This is where I stop and hit <SCAN>. It’s the best I can do with this negative under any circumstances. Granted, I may need to optimize my exposure and development of TXP to get the deepest shadows away from the film base.
I’ll give another example of an Ilford FP4 negative exposed through the Step Wedge and given my standard development for FP4.
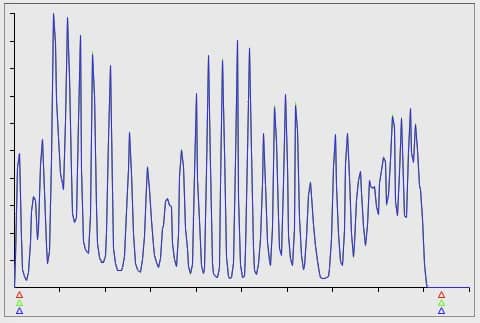
The first histogram results by scanning the film using a <GENERIC FILM> preset. Note how both the shadows (empty areas + Steps 1-3 on left of histogram) and the highlights (Steps 29-31 and blocked areas on right of histogram) are not well separated. In a final image or final print, this “automatic” scan would have clipped shadows and highlights.
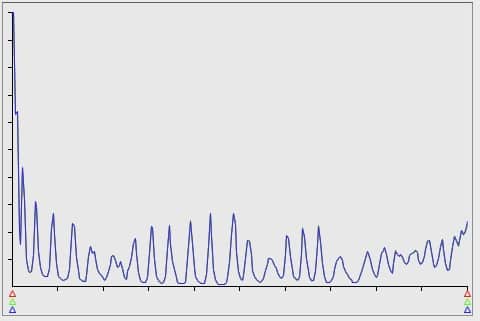
The next histogram is from the exact same negative, but the settings have been explicitly set to optimize the output image file to separate the various step wedge densities. In this scan, the RGB Exposure was set to 1.12 to move everything (all densities) to the left. Then I chose a film model having a contrast index (CI) of 0.70 to best match the actual CI of the negative. You’ll see now that every one of the 31 steps of the step wedge is discerned in the histogram, and can therefore be realized in a post-processed image or print. No important shadows nor any highlights will be clipped in the image.
 I hope this was helpful, and I hope it doesn’t sound too complicated; it’s really not. It takes some time to learn the essentials of scanning negatives, but once you’ve invested in that time, you’re good to make great scans forever.
I wrote a tutorial on how to easily convert your flatbed scanner to do wet mount scanning without buying special holders. I can perfectly wet mount 2 strips of 120 or 2 4×5 negatives using this technique in about 30 seconds. Here’s the tutorial:
Happy scanning!
Subscribe to my newsletter “Under the Darkcloth” here.


